2. Basic Usage
Estimated reading time: 1 minute
After activating BRAVIA Meeting Client, it becomes resident, and the icons below are displayed in the notification area of Windows or the status menu of the Mac menu bar, respectively.
- Windows notification area icon:

- Mac status menu icon:

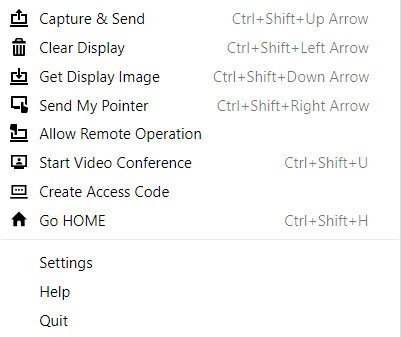
Clicking the icon in the notification area (Windows) or status menu (Mac) displays the following BRAVIA Meeting Client menu.
- Menu on Windows:
- Menu on Mac:
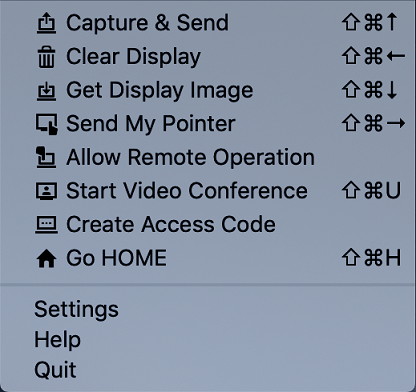
Click an item on the menu to use that function. If you are using BRAVIA Meeting Client for the first time, select [Settings] from the menu and configure the various settings.
When the icon is not displayed in the notification area of Windows
If the icon is not displayed in the notification area of Windows, change the customization settings of the notification area so that it will be displayed.
On Windows 10
-
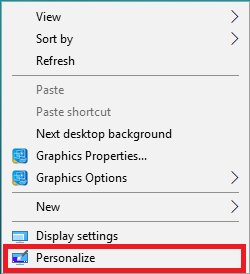
Right-click on the desktop to display the menu, and then click [Personalize].
-
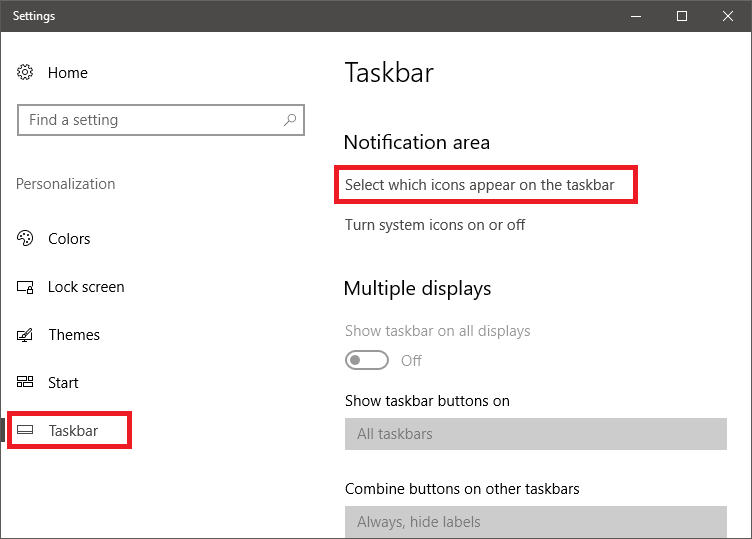
Select [Taskbar] from the categories displayed on the left side of the window, and then click [Select which icons appear on the taskbar].
-
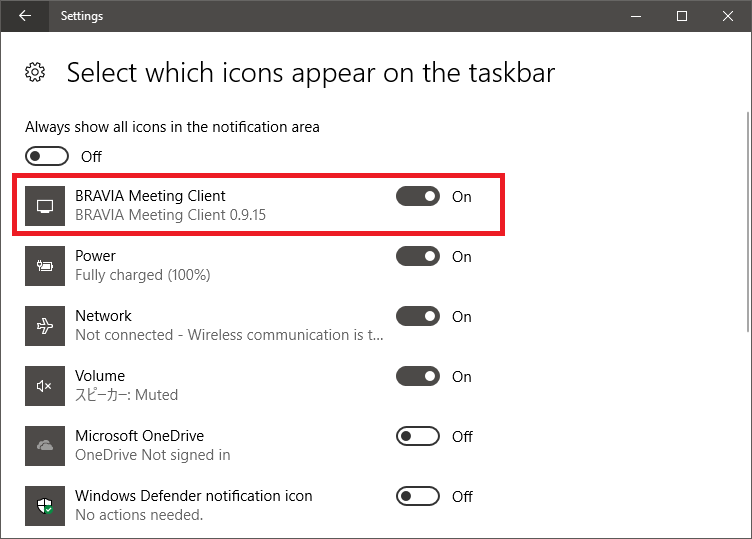
Set BRAVIA Meeting Client to [On].
On Windows 8.1 and Windows 7
-
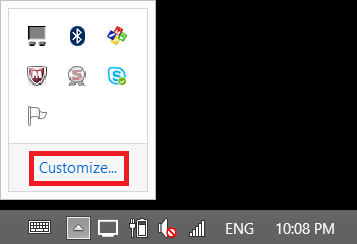
Click the [Show hidden icons] arrow in the notification area.

-
Click [Customize].
-
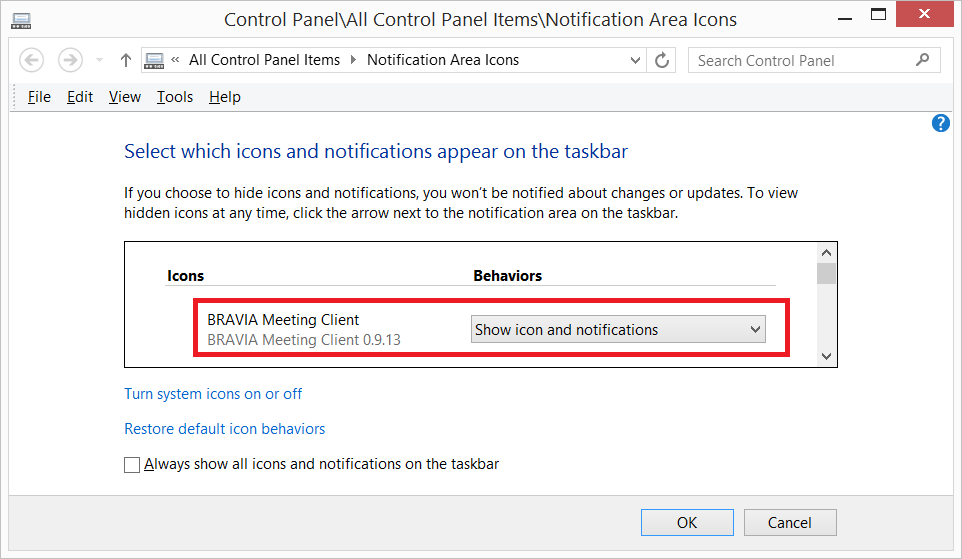
In the Notification Area Icons settings, set the BRAVIA Meeting Client operations to [Show icon and notifications].
-
Click [OK].
Enable screen recording for Mac
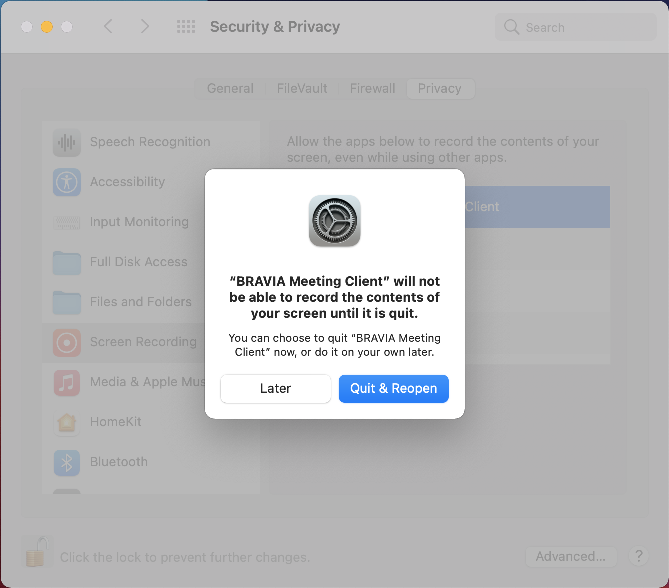
To use the video mirroring function, you need to enable screen recoding for BRAVIA Meeting Client.
- Open [System Preferences], click [Security & Privacy], then click [Privacy] tab.
- Select [Screen Recording].
-
Select the checkbox of [BRAVIA Meeting Client] to allow it to record your screen.
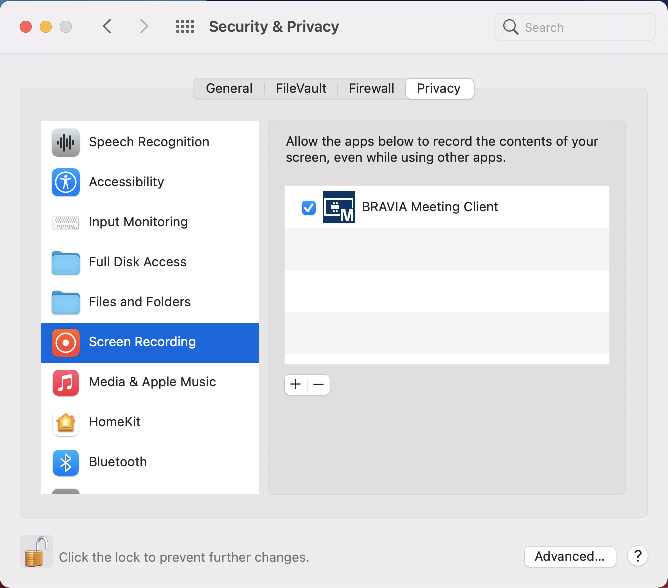
- Click [Quit & Reopen] on the confirmation dialog to apply the change.
