Software / Solution
BRAVIA Professional Displays with “Pro mode” provide a wide range of functional support through four categories of software solutions: standard pre-installed apps, launch service functionality available in the “Pro settings” menu, optional solution software programs, and support for HTML5 application development.
List of software / solutions
*The GUI is subject to change without prior notice.
Standard Apps
These apps are available from the [Home] screen. They can be configured and used even when offline.
![図:「プロ設定モード」環境の[ホーム画面]イメージ](/wp-content/uploads/2025/11/08-001.png)
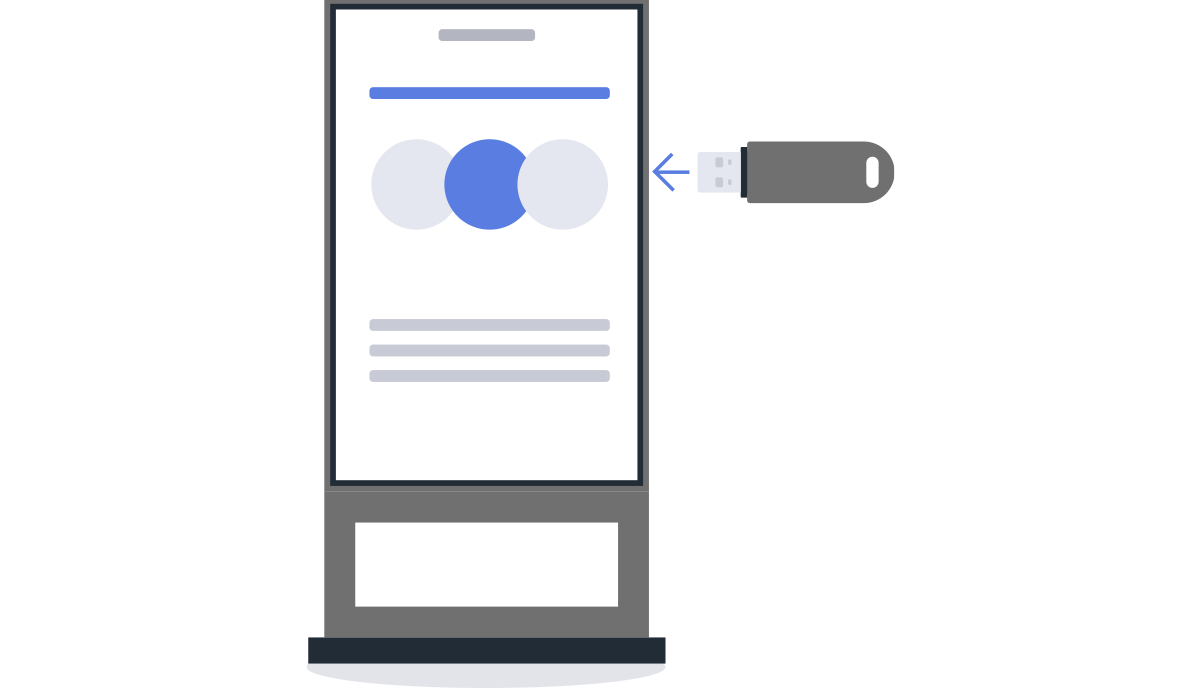
BRAVIA Signage Free
Enables stand-alone digital signage. Built-in storage and USB flash drive playback are available.

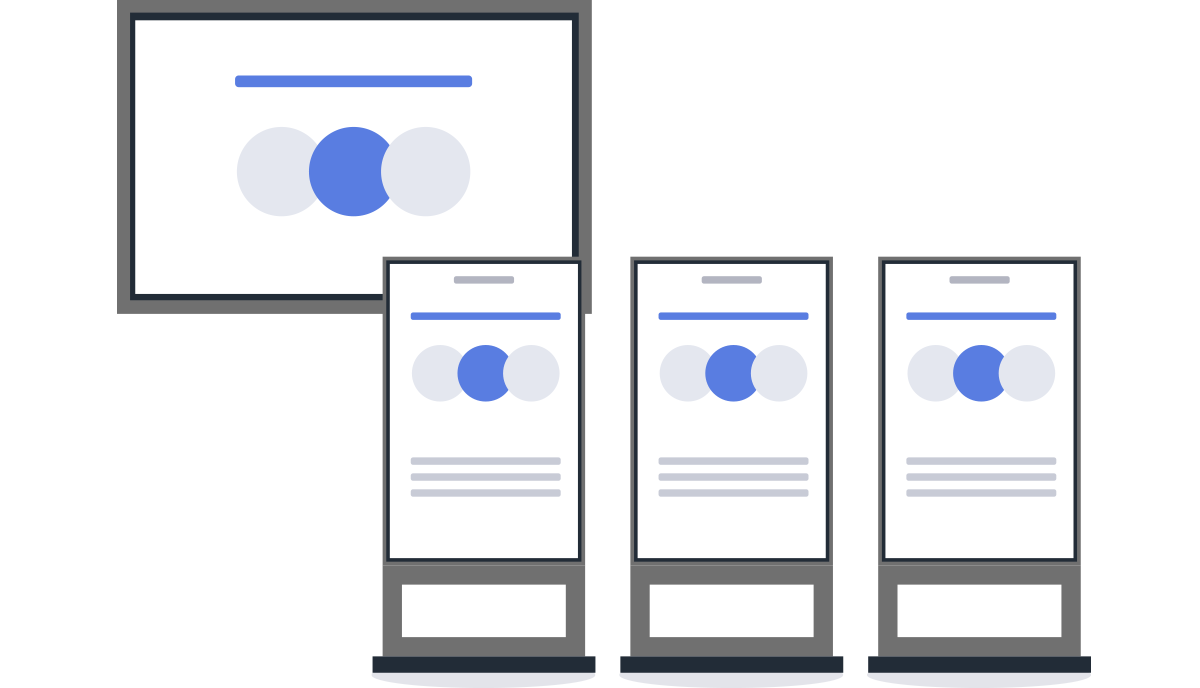
Multi Display Settings
An application for multi-screen monitor configuration. Easily combine multiple displays into a tiled layout.

Crestron XiO Cloud
It works with Crestron’s XiO Cloud to support centralized display management via the cloud.

Restore AirPlay Settings
When you turn on the display in the “Pro mode” environment, the app automatically restores the AirPlay settings pre-configured in “Pro settings.”

DICOM SIM Player※
Used to check X-ray images at medical institutions. DICOM-compliant gamma settings are used to provide simplified display of medical images.
※ When using this app in “Normal mode”, you need to enable [Professional app display setting] in Pro settings.
Startup services
These are apps and features available from [Startup services], one of the [Pro settings] .

BRAVIA Meeting Free
Meeting support software that allows you to start a meeting smoothly just by establishing a connection.

BRAVIA WebControl UI
This is a convenient management tool that allows you to remotely control and configure the display via a web browser.

Crestron Connected
This is an extended connection function for integrating an external application or system with the display.

Remote Firmware Update Service
For Developer
This service allows you to update the display firmware over the network via an app*.
*You need an application that integrates the REST API. See the REST API integration guide
* Japan not supported.

Restore AirPlay Settings
When you turn on the display in the “Pro mode” environment, the app automatically restores the AirPlay settings pre-configured in “Pro settings.”

Touch Assistant
This is an application* that enables display operations through touch without using a remote control. It displays [Back] and [Home] buttons on the display screen during drawing or operations.
*A touch panel and pen input device are required separately.
* Japan not supported.

Touch Keyboard
Virtual keyboard function* that can be operated directly on the monitor screen.
* An external keyboard or input device may be required separately.

Whiteboard
A digital whiteboard function that allows you to write directly on the monitor screen*.
*A touch panel and pen input device are required separately.
*BZ40P/BZ35P/BZ30P not supported.

Option
This solution requires a separate contract or download.
BRAVIA Signage (paid)
A digital signage software solution that distributes content and manages related information across multiple displays over a network.

Display Power Management
Allows you to remotely control the power status of multiple displays over a network. Schedule-based control is also available.
*BZ40P/BZ35P/BZ30P not supported.

IP Remote
An app that allows you to operate the remote control from your smartphone. It can control multiple displays and is available as a free download.
HTML5 Application Development
BRAVIA Professional Displays support development and implementation of HTML5-based custom applications. They maintain backward compatibility even after OS upgrades, requiring no app modifications. They function as HTML5-compatible smart displays, not just standard displays. They also support video streaming formats that standard web browsers do not handle.
