6. Open power management web page
Estimated reading time: 2 minutes
You can open the web page of power management by following URL.
| URL of power management | http://[IP address of server PC]:40001 (e.g. http://192.168.100.100:40001) |
6.1. Power Management Page

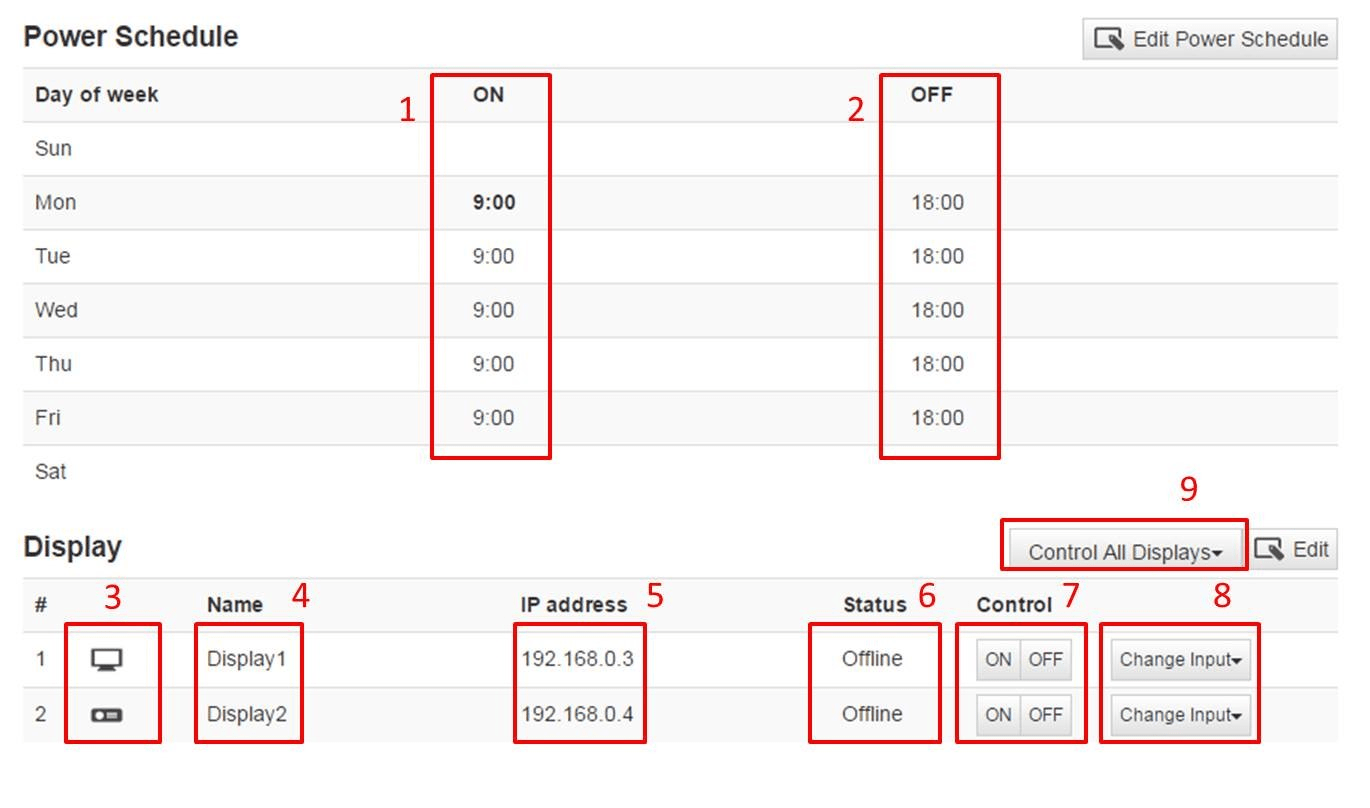
In the power management page (Figure 1), you can see the schedule of power on/off of display (1, 2), name of display (4), IP address of display (5), current power status of display (6). Meaning of power status is explained in following chart.
| Status | Description |
|---|---|
| Offline | Display is not connected to the server. |
| Power ON | Display is connected to the server, and the power status of the display is On. |
| Power OFF | Display is connected to the server, and the power status of the display is Off. |
By pressing Control button (7), you can change the power status of display manually. Even after changing power status of display by this button, the power status of display can be changed by schedule. When Change Input (8) is selected, you can change the input of selected display.
By pressing Edit Power Schedule button, the page moves into the editing-schedule mode.
By pressing Display Edit button, the page moves into the editing-display mode.
You can control power and input status by all connected displays by Control All Displays (9). HDMI1-4 is for BRAVIA, while InputA-F is for Projector.
6.1.1. Editing Schedule
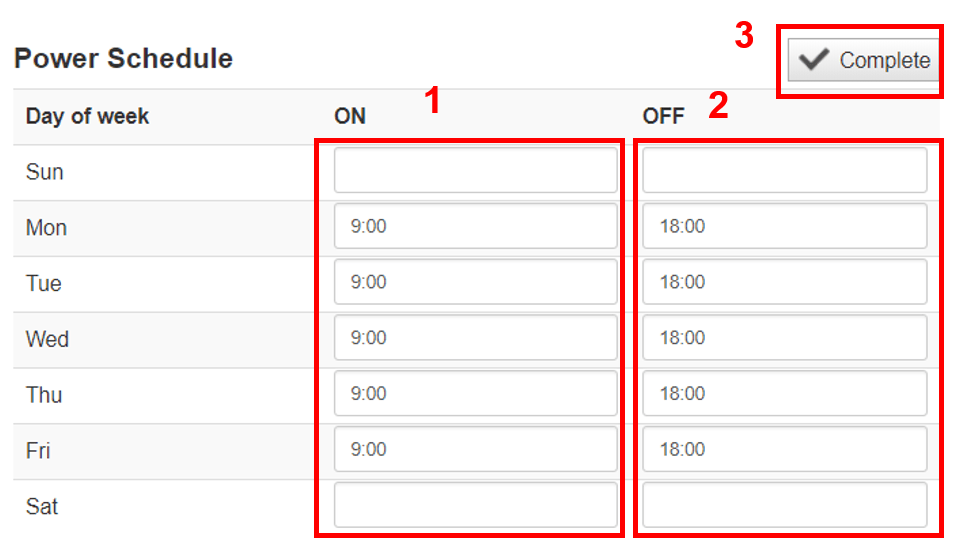
When you press the Edit Power Schedule button, the schedule editing menu is shown (Figure 2).

In this mode (Figure 2), you can edit the time of power-on and power-off of display by a day of week (1, 2). You can set both or one value of power-on time and power-off time. When you want not to change display power status in a day of week, please keep it to white spaces. After completion of editing the time of power-on and power-off, please press Complete button (3) to save them.
6.1.2. Editing Display

In this mode (Figure 3), you can edit the display information to connect to the server. At first, you need to add entry of display by pressing Add Display button (1). On the entry of display, please set BRAVIA or Projector by icon (3), display name (4) and IP address of the display (5).
When authentication setting of BRAVIA (refer to 5.2) is enabled, Please set Pre-Shared Key (6). Projector is out of scope about this authentication scheme.
If you want to add more than one entry, please press Add button again. After adding entries, please press Complete button (4) to save them. If you want to delete an entry, please press Delete button (7).


