5. Startup BRAVIA Signage Operation
Estimated reading time: 7 minutes
The following procedures in this section describe the basic operations. Refer to these procedures for the operation check after setup and to the introduction to start. The following descriptions assume that [Power Management] on the [Settings] page is set to “Auto power off except during schedule delivery”.
- [1] Create groups and group Displays
- [2] Create playlists and delivery schedule, and deliver content to Display
- [3] Use interrupt delivery
Refer to “BRAVIA Signage User Guide” for details.
5.1. Let’s Group Displays
BRAVIA Signage groups and manages displays. Playlist delivery schedules and power schedules are managed and operated by each group. It should be noted that display needs to belong to a group. In the example below, though only 1 display is registered in BRAVIA Signage, multiple displays can be registered.
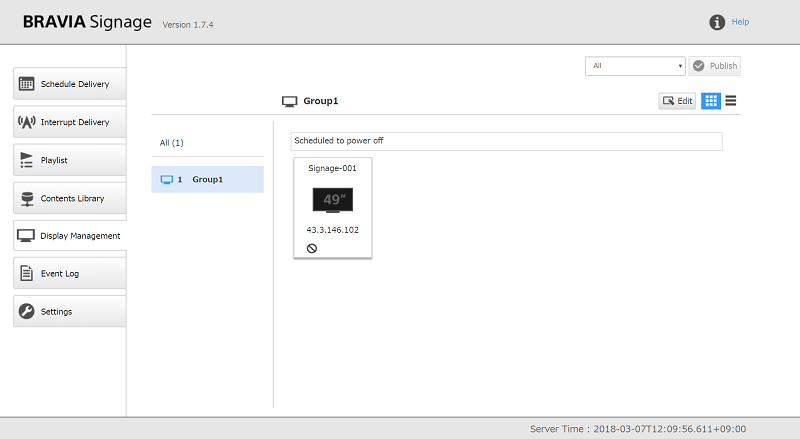
[1] Open a browser on the client PC, access the URL following 4.4. Configure and Start BRAVIA Signage Player, and open the Operation web application. Select [Display Management] on the left side of the screen, and open the [Display Management] page, display the display information setup with BRAVIA Signage Player.
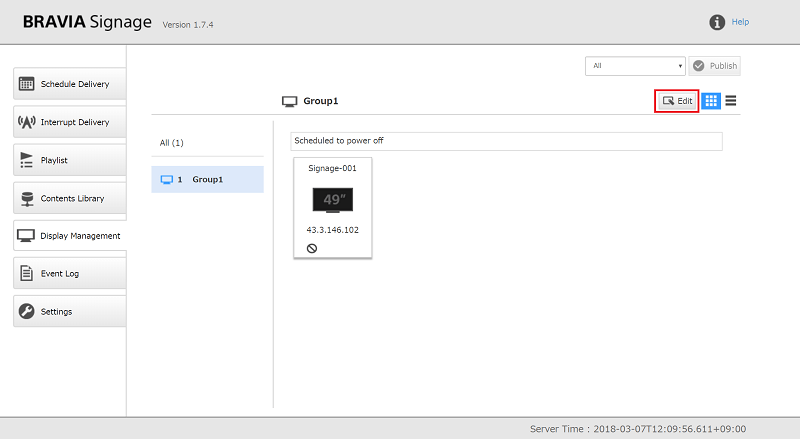
[2] Press [Edit] button to edit the registered information.
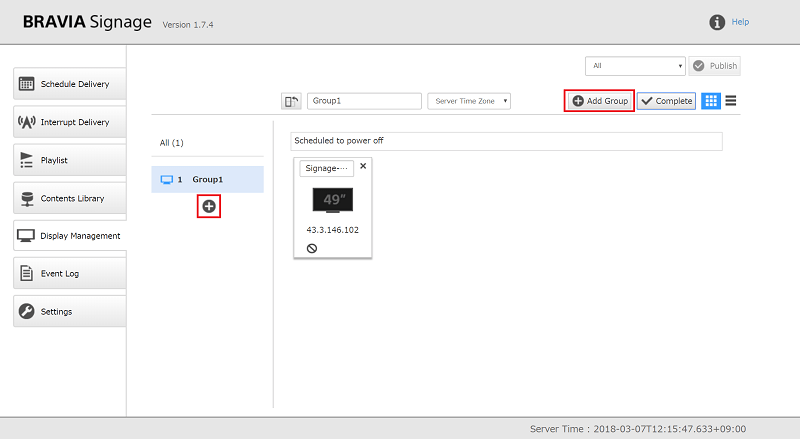
[3] When the [Add Group] button on the upper right or [+] button displayed under group name on the left is pressed, add a new group.
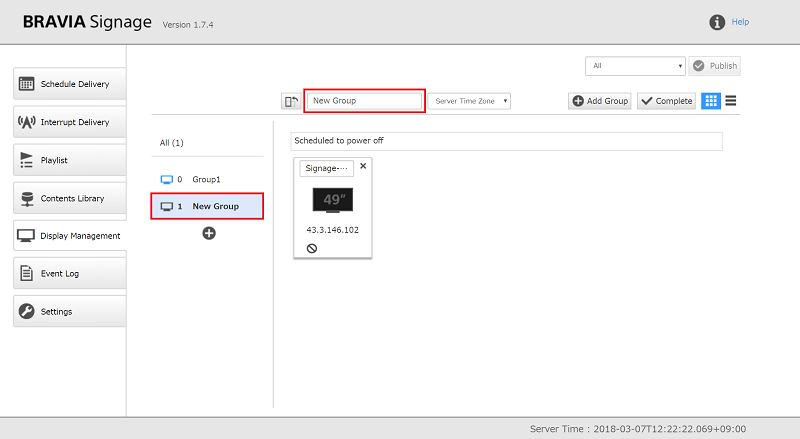
[4] Edit the group name and change the group display belongs to. Drag the displayed display information and drag it to group name on the left In the diagram below. In this procedure, add “New Group” as the group name, and move display to the group.
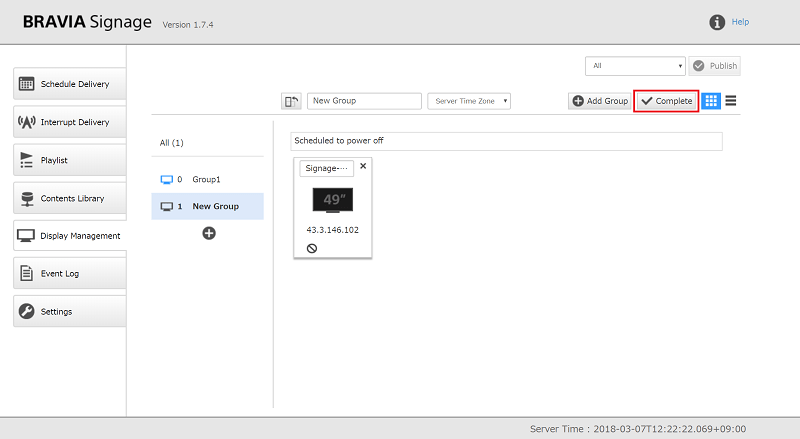
Group editing is complete when the [Complete] button is pressed.
5.2. Let’s Create a Playlist and Delivery Schedule, and Deliver Content to Display
In this section, create a playlist and configure the delivery schedule to the group created in 5.1. Let’s Group Displays. In this example, 2 contents that are 1 video file and 1 image file are registered, and a playlist these contents are played in order is created. Configure to deliver 10:00 to 15:00 on Sunday to Saturday.
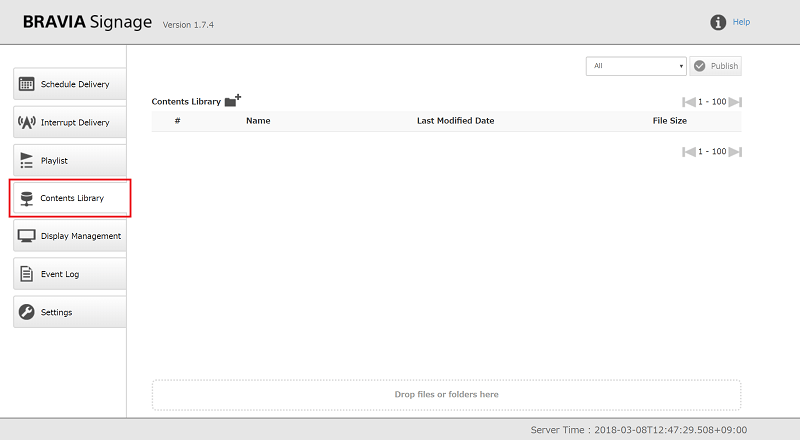
[1] Select [Contents Library] on the left side of the screen and open the [Contents Library] page.
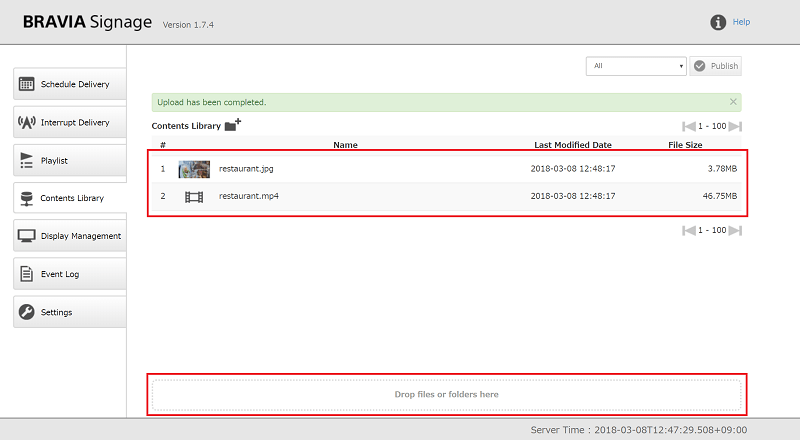
[2] To register the delivered contents, drag and drop the files to [Drop files or folders here]. In this example, “restaurant.mp4” and “restaurant.jpg” are registered as additional content. After completing registration, the content can be previewed in another tab of the browser application when you double-click the content.
If the content cannot be previewed, check whether or not the IP address included in the URL in the address bar of your browser application is correct. For example, the IP address of the content library may not be properly configured, as in the following situations. In this case, clearly configure the IP address of the content server in accordance with the procedure in configuration file “CONTENTS_SERVER_URL” in 1.3. of the “BRAVIA Signage Advanced User Guide” and restart BRAVIA Signage Server.
- There are multiple network interfaces with the same IP address.
- After setting up BRAVIA Signage Server and registering the contents with the content library feature in an environment with the network offline, the server PC was connected to the network and the IP address was assigned, etc.
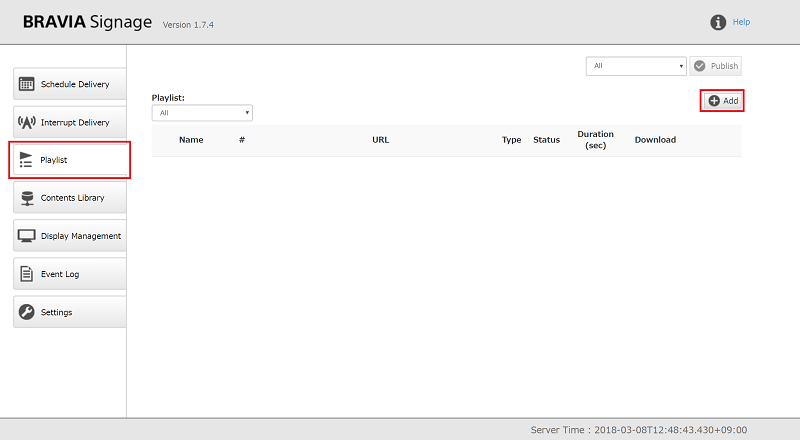
[3] Select [Playlist] on the left side of the screen and open the [Playlist] page, and push the [Add] button on the upper right.
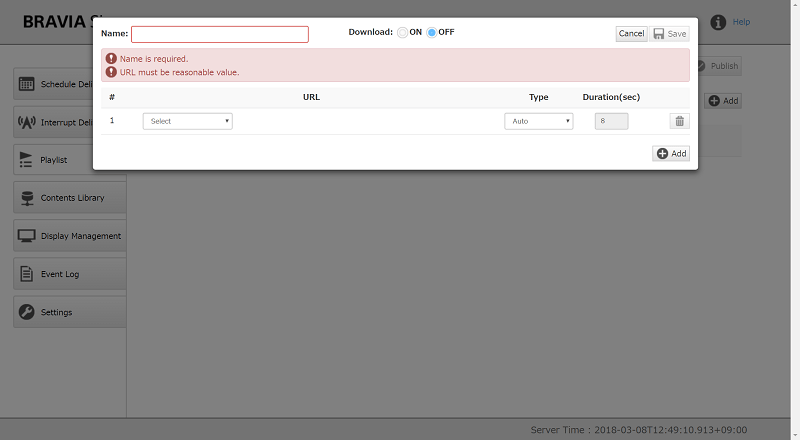
[4] The dialog to create a playlist appears.
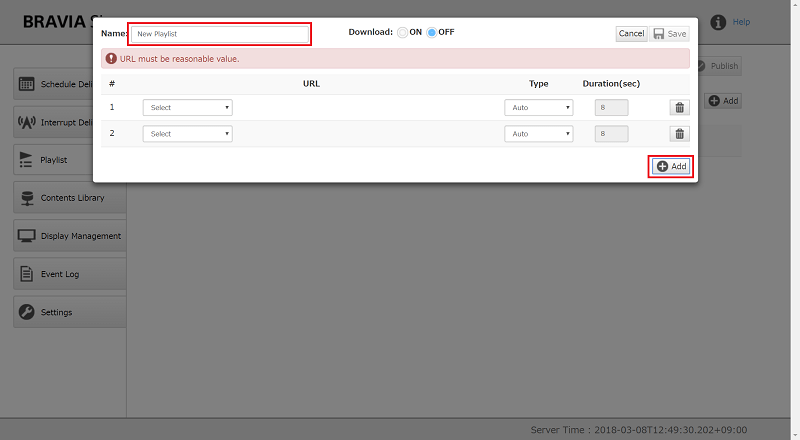
[5] Input a playlist name in [Name] on the top left. In this example, “New Playlist” is entered. Next, configure the content below. When the dialog is opened, only 1 field is displayed. Push the [Add] button on the lower right to configure the 2 contents.
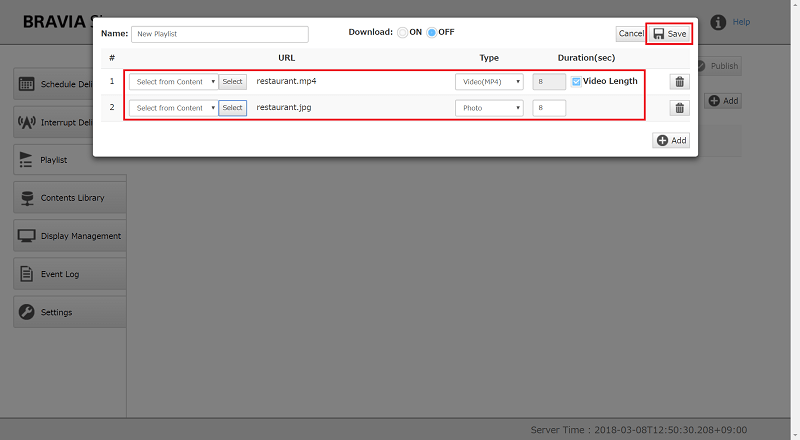
[6] Select “Select from Contents Library” and push [Select] button to select from contents registered to Contents Library, and specify “Video Length” and “8” seconds as each duration. Push the [Save] button on the upper right to complete.
[7] After the dialog is closed, the created playlist is displayed on the [Playlist] page.
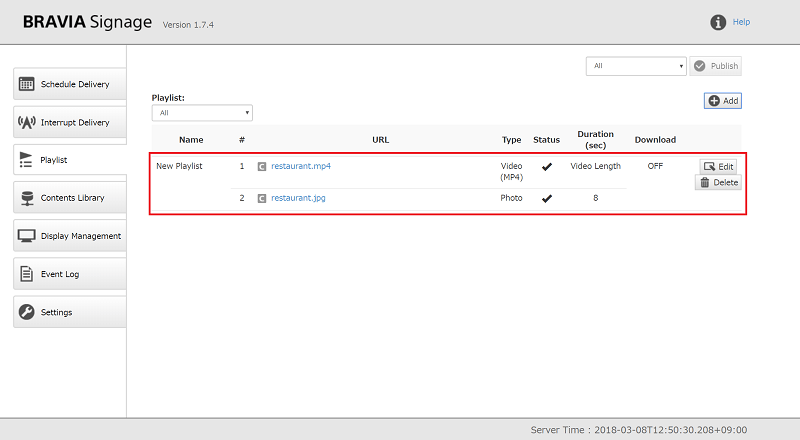
[8] Next, try to create a delivery schedule with this playlist. Select [Schedule Delivery], and open the [Schedule Delivery] page.
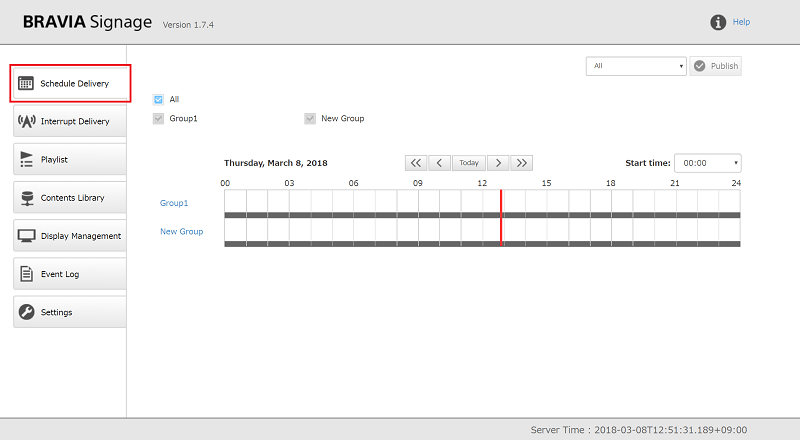
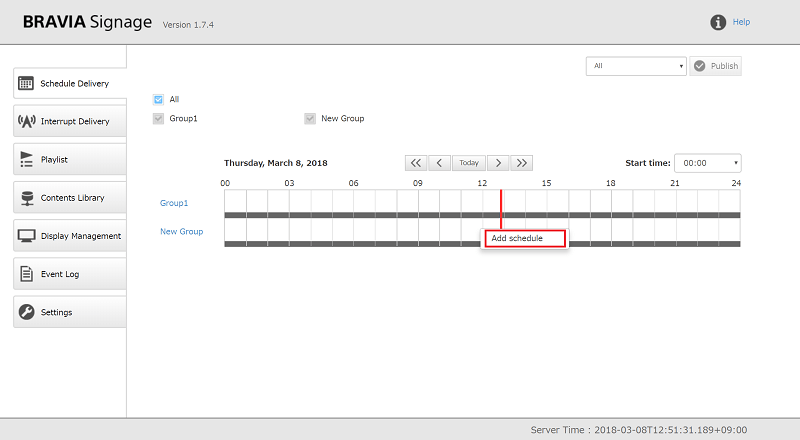
[9] Create a new schedule for “New Group”. Click on the scheduler of “New Group” and select [Add schedule].
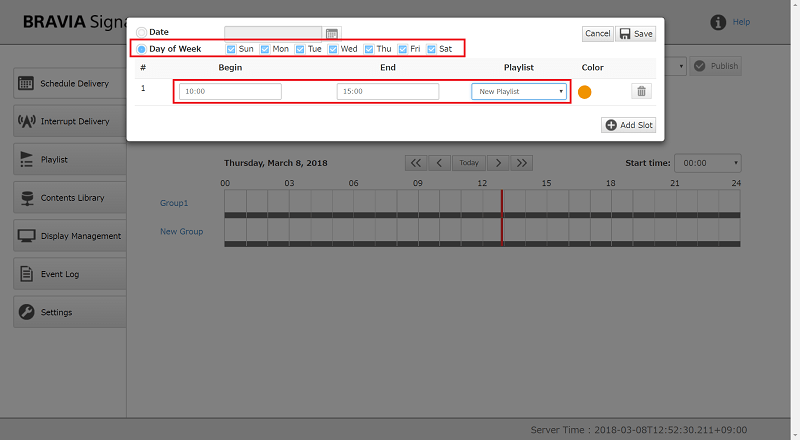
[10] A dialog to create the schedule is displayed as seen in the diagram below.
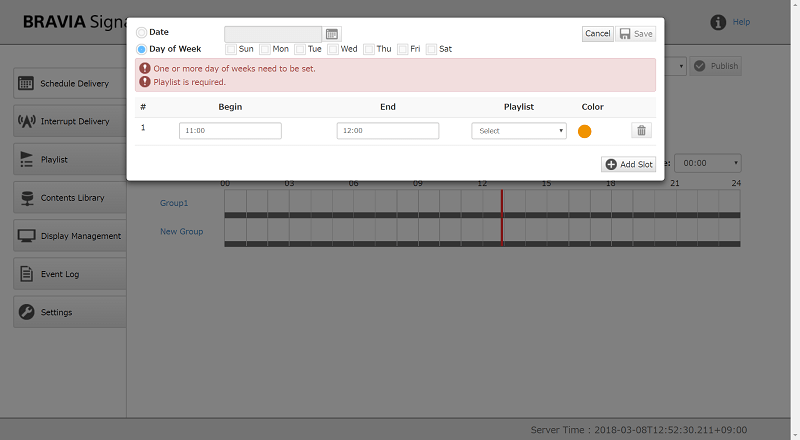
[11] Check all day of week from Sunday to Saturday, change [Begin] to “10:00” and [End] to “15:00”, and “New Playlist” from [Playlist] as seen in the diagram below. Push the [Save] button on the upper right to complete.
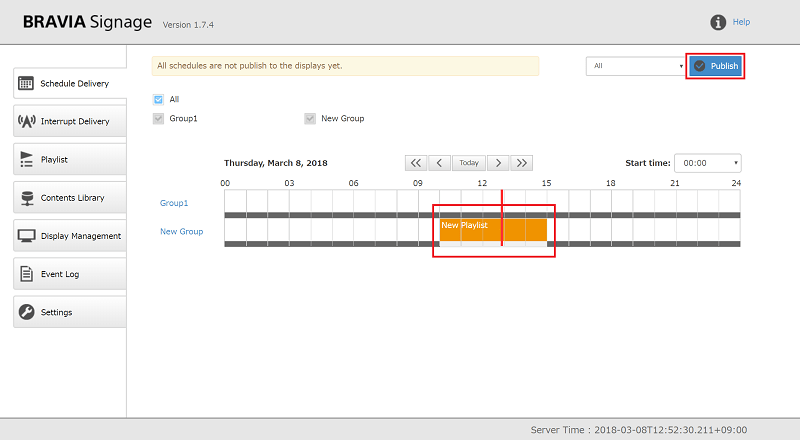
[12] After the dialog closes, the created schedule is displayed on the [Schedule Delivery] page. When push the [Publish] button is pressed, the content in the playlists are played on displays that belong to “New Group” in accordance with the schedule. Note that BRAVIA Signage Player gets the time and time zone from the server that BRAVIA Signage Server runs on and the BRAVIA Signage Player does not use the time and time zone set on display.
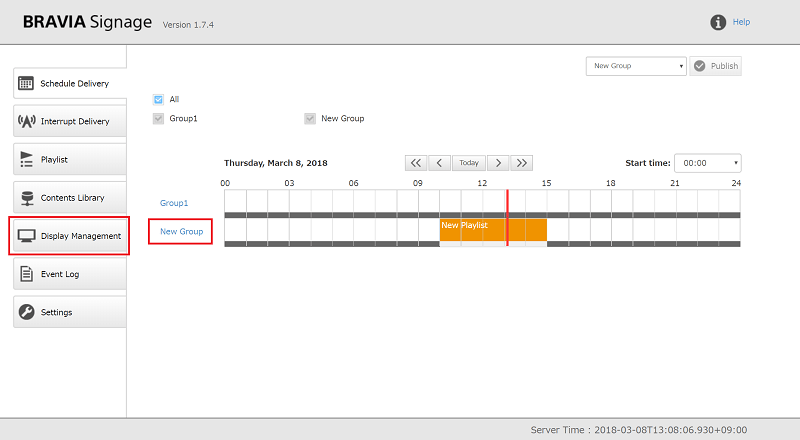
[13] The status after these settings for delivery can be checked from the Operation web application. Click on a group name displayed on this page or select [Display Management] on the left side of the screen and open the [Display Management] page.
[14] Select the group you want to check and the status of the group is displayed at the center of the screen.
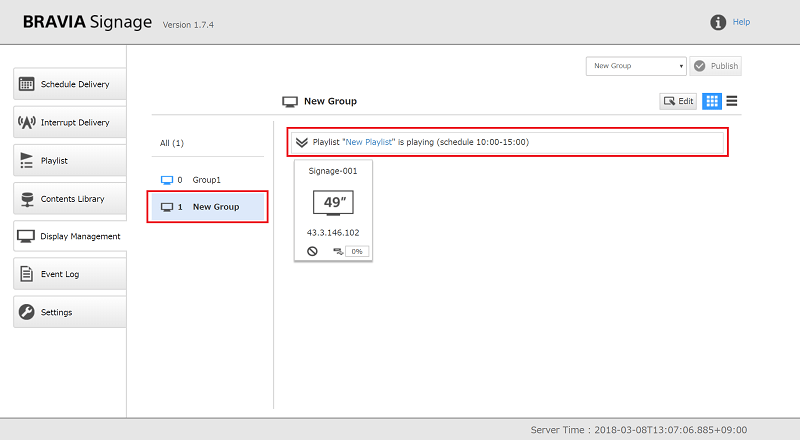
[15] If the displays of the group are being published, you can check the delivery status of each display by opening the group status and selecting a display.
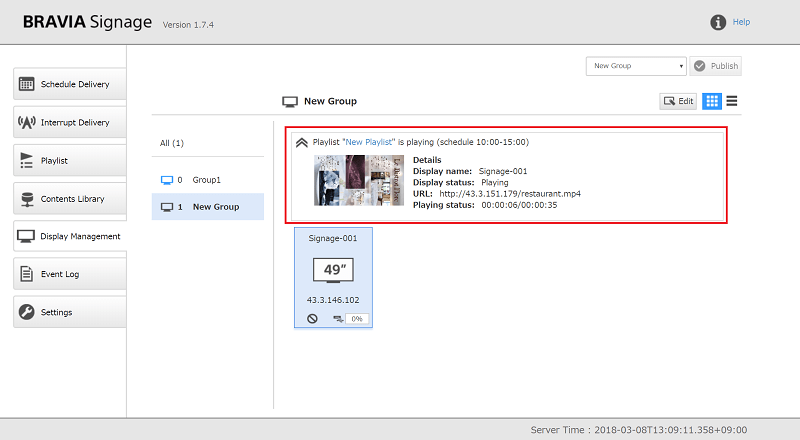
It should be noted that if the content do not play as expected, confirm that display is connected to network, or see “About USB storage device access” at 1.6 in “BRAVIA Signage User Guide”.
5.3. Interrupt Delivery
In this section, an interrupt delivery is created to the group created at 5.1. Let’s Group Displays.
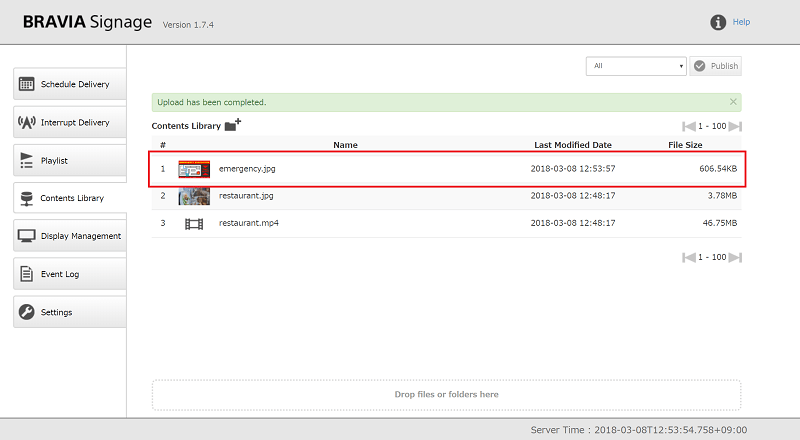
[1] Register the content in accordance with steps [1] and [2] of 5.2. Let’s Create a Playlist and Delivery Schedule, and Deliver Content to Display. In this example, the content named “emergency.jpg” is registered.
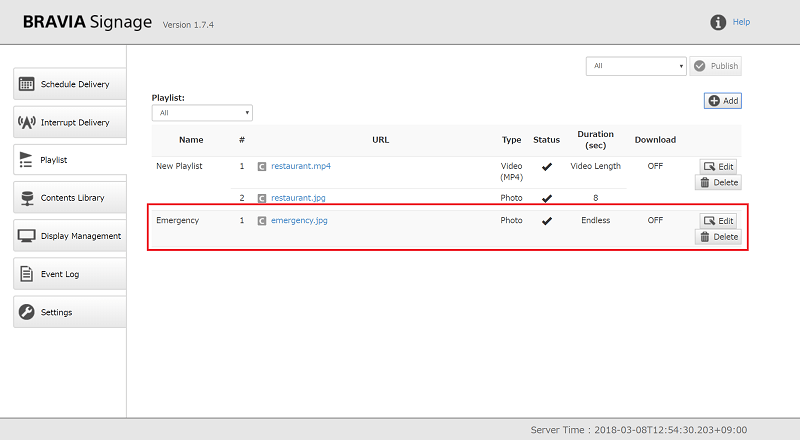
[2] Create the playlist in accordance with steps [1] and [2] of 5.2. Let’s Create a Playlist and Delivery Schedule, and Deliver Content to Display. In this example, the content named “Emergency” is registered.
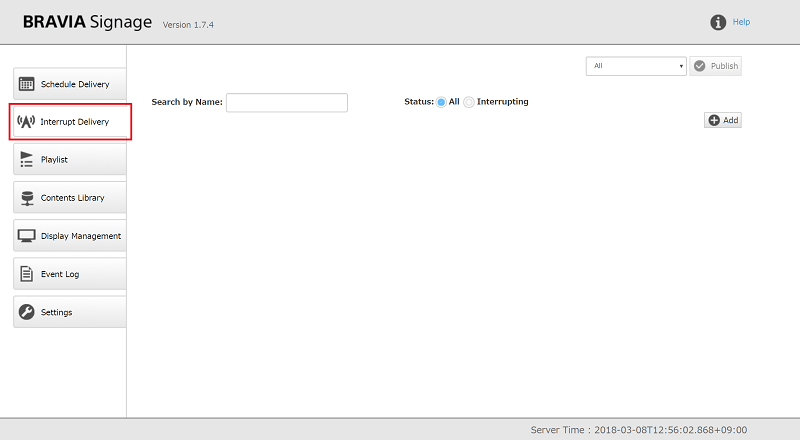
[3] Select [Interrupt Delivery] on the left side of the screen and open the [Interrupt Delivery] page. Push the [Add] button on the upper right to create the new interrupt delivery.
[4] The template of Interrupt delivery is added as seen in the diagram below.
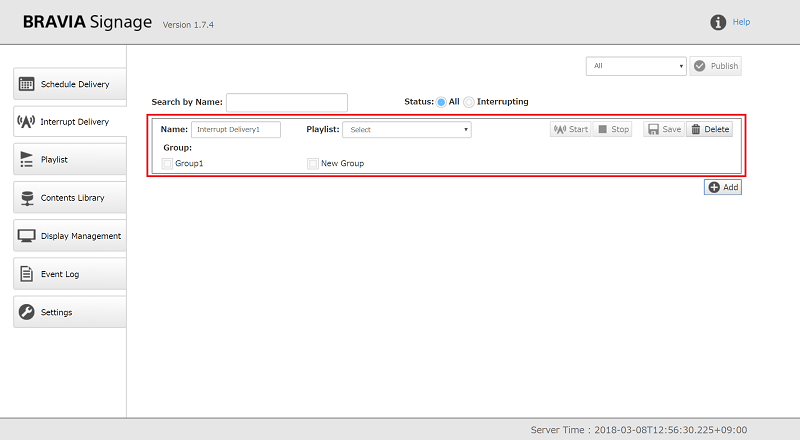
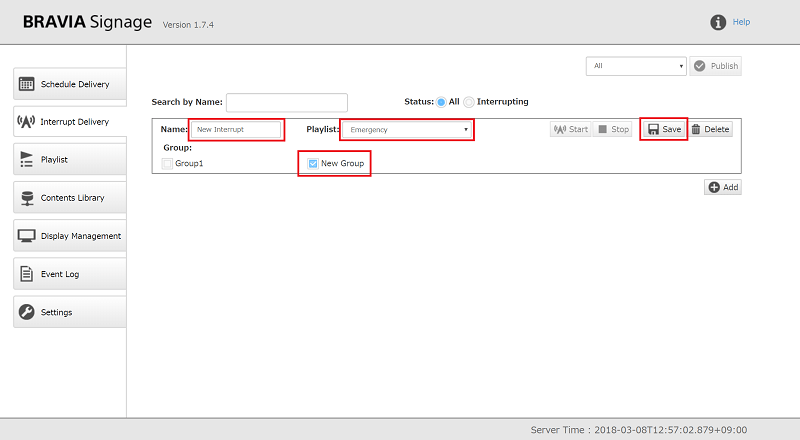
[5] Input the interrupt delivery name to [Name]. In this example, “New Interrupt” is entered. Next, check the group to deliverIn this example, “New Group” is checked and “Emergency” is selected from [Playlist]. Push the [Save] button on the right side of the screen to create.
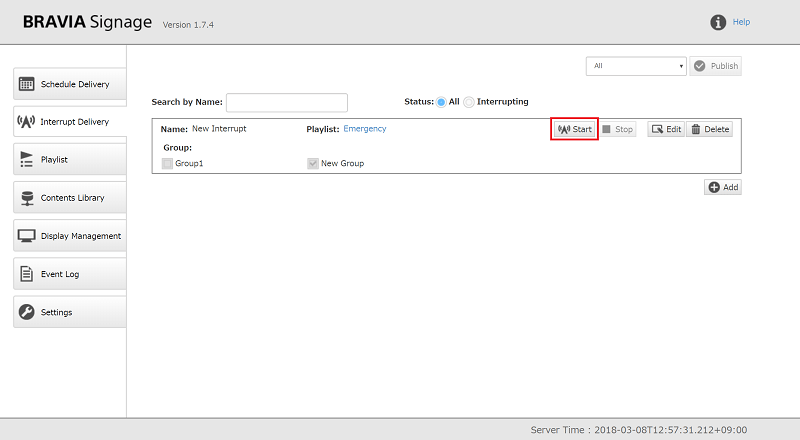
[6] When the [Start] button is pressed, the interrupt delivery to displays that belong to “New Group” is started.
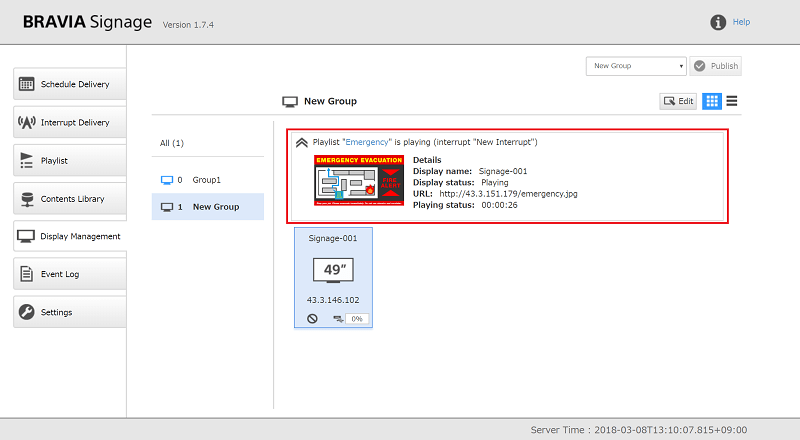
[7] The status after completing the settings for delivery can be checked from the [Display Management] page of the Operation web application, as in steps [13] to [15] of 5.2. Let’s Create a Playlist and Delivery Schedule, and Deliver Content to Display.
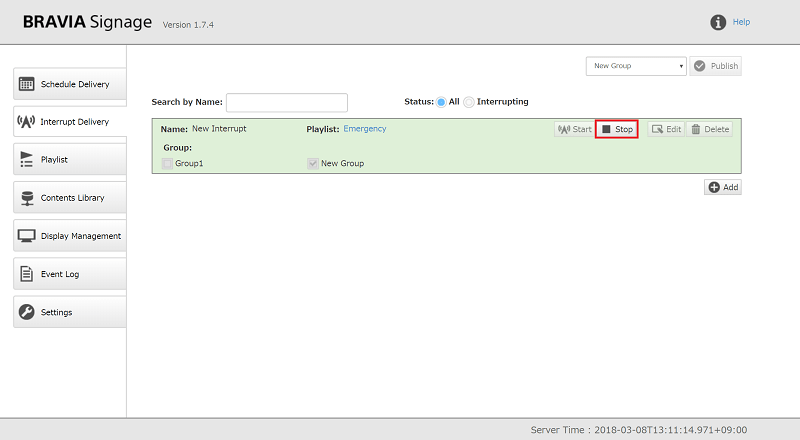
[8] Push the [Stop] button to stop the interrupt delivery.
