2. Update and Uninstall BRAVIA Signage
Estimated reading time: 12 minutes
This section describes the update and uninstalling of BRAVIA Signage. The overview of the procedure is as follows:
- [A] Update BRAVIA Signage
- [1] Update BRAVIA Signage Server (Required)
- [2] Update BRAVIA Signage Player (Required)
- [B] Uninstall BRAVIA Signage
- [1] Uninstall BRAVIA Signage Server (Required)
- [2] Uninstall BRAVIA Signage Player (Required)
In addition, BRAVIA Signage Server and BRAVIA Signage Player check their versions against each other at connection in order to run properly. Connection is allowed only in the following cases.
- BRAVIA Signage 1.7.3 or earlier is used and the BRAVIA Signage Server version is the same as BRAVIA Signage Player.
- BRAVIA Signage 1.7.4 or later is used, and the BRAVIA Signage Player version is the same as or earlier than BRAVIA Signage Server.
2.1. Update BRAVIA Signage Server
This section describes the procedure for updating to a new version of the database software and BRAVIA Signage Server installed on the server PC.
[Notice]
*When updating from version 1.8.4 or earlier to version 2.0.0, there is a risk that the update will fail with the message “Error: migration failed.” Therefore, update to the latest version (2.0.1) instead of version 2.0.0. If the update to version 2.0.0 fails, follow the procedure described in “Responding to data migration failure” to restore the previous version, and then update to version 2.0.1. Please see “2.5. Notice and Information” for the 2.0.0 update notice.
*When updating to BRAVIA Signage Server version 1.8.4 or earlier, all information such as playlists and schedules configured in the previous version will be preserved. However, when updating to BRAVIA Signage Server version 2.0.0 or later from version 1.8.4 or earlier, the event log will not be preserved. If you want to back up the event log, download it manually before updating. For details on how to download the event log, refer to the following: [Help] > 2. Basic operation
Windows
[1] Copy the “windows” folder in the package on any directory in your Server.
[2] Right-click setup file(*1) in this “windows” folder and select “Run as administrator”. The following window is displayed:
(*1) When updating to BRAVIA Signage Server 1.8.4 or earlier, run setup.bat. When updating to BRAVIA Signage Server 2.0.0 or later, run setup.exe.
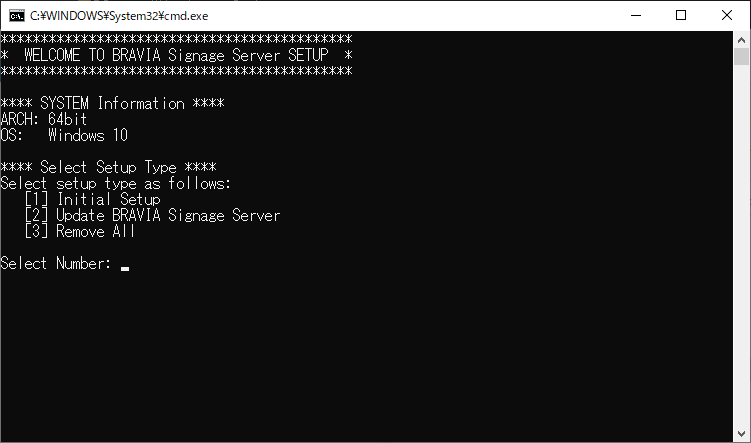
If the directory path name includes half width letters such as ‘@#$%^&()_+~-=`{}[]’, the above screen cannot be displayed depending on the combination of these letters. If the screen does not display, please confirm the directory path name.
[3] On the displayed screen, enter “2” as shown below and press the ENTER key.
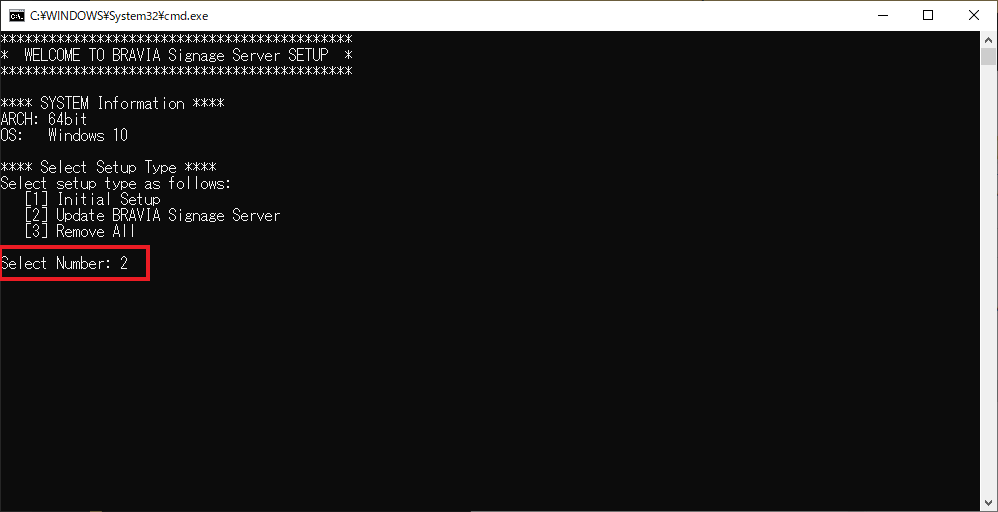
( For update to BRAVIA Signage Server 1.8.4 or earlier )
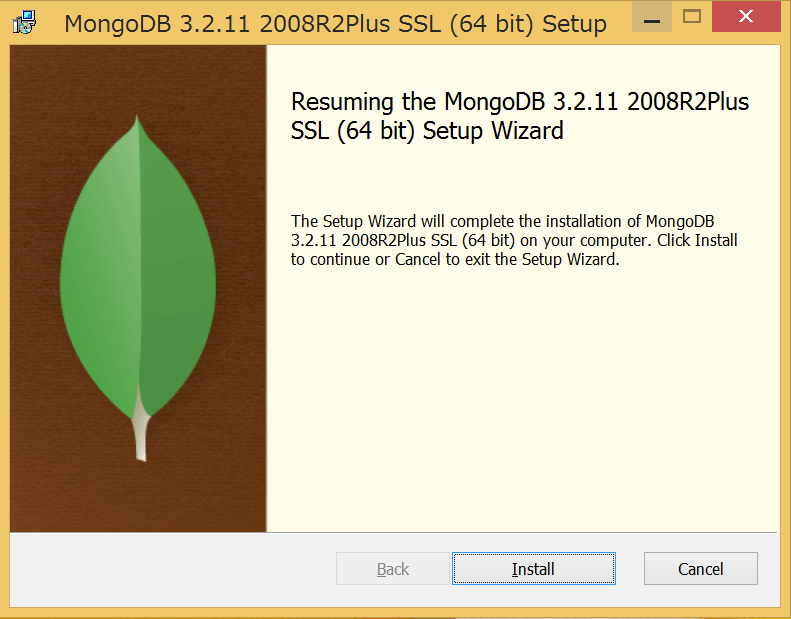
The MongoDB installation screen is displayed. Follow the instructions on the screen to proceed with the MongoDB update.
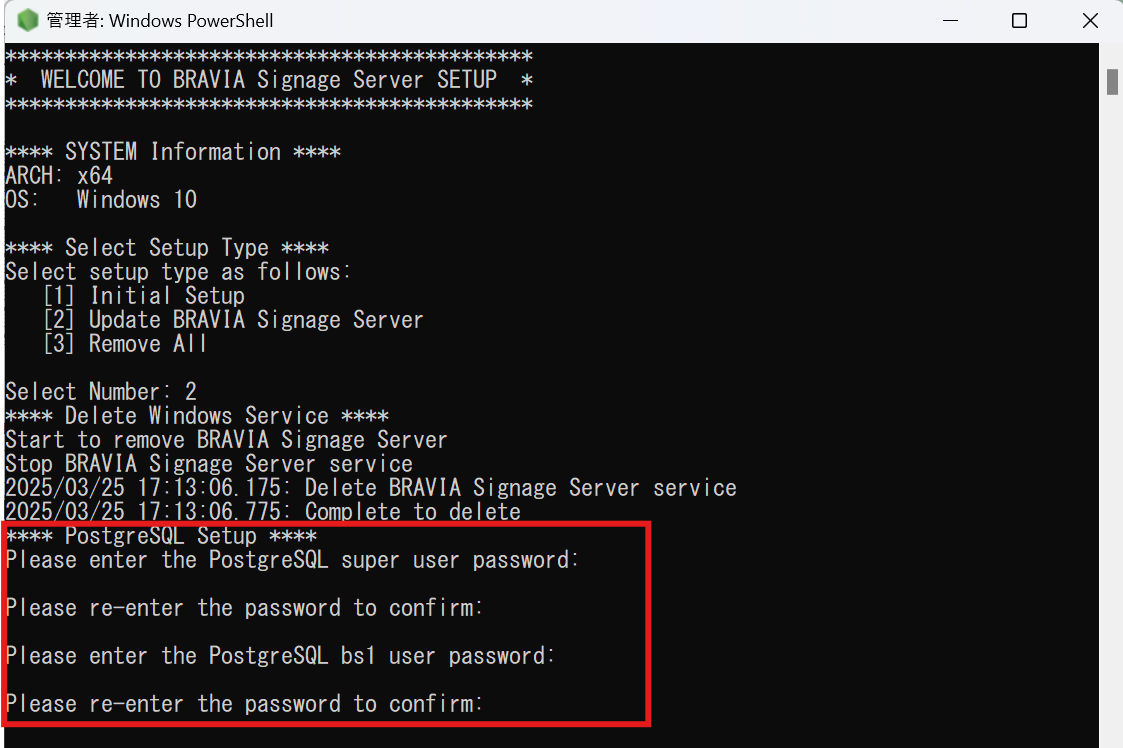
( For update to BRAVIA Signage Server 2.0.0 or later )
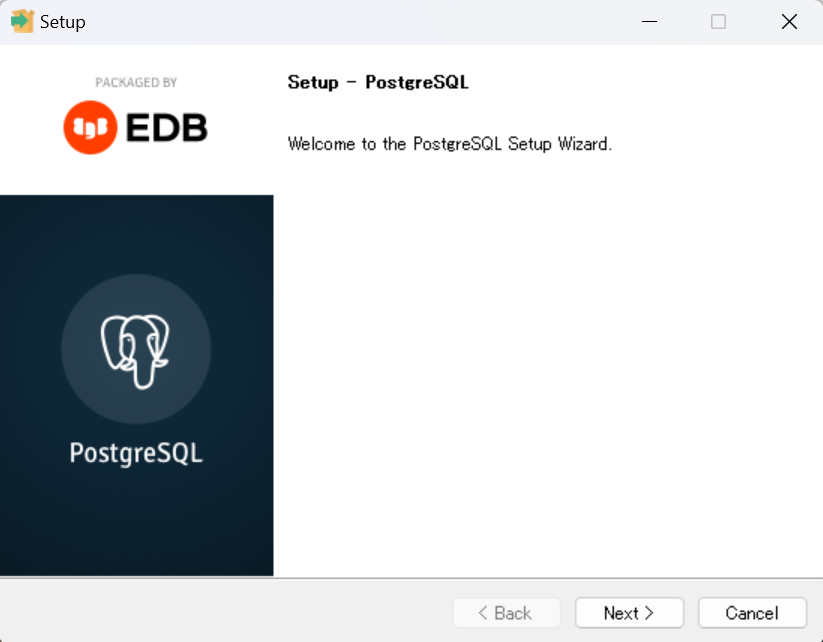
Specify the passwords for the PostgreSQL superuser and BRAVIA Signage user. (The passwords should be a string of at least 8 characters, including both letters and numbers.) The PostgreSQL installation screen appears as shown below. Follow the instructions on the screen to proceed with the PostgreSQL update.
[4] After the update is complete, the database software settings are configured automatically as shown below.
( For update to BRAVIA Signage Server 1.8.4 or earlier )
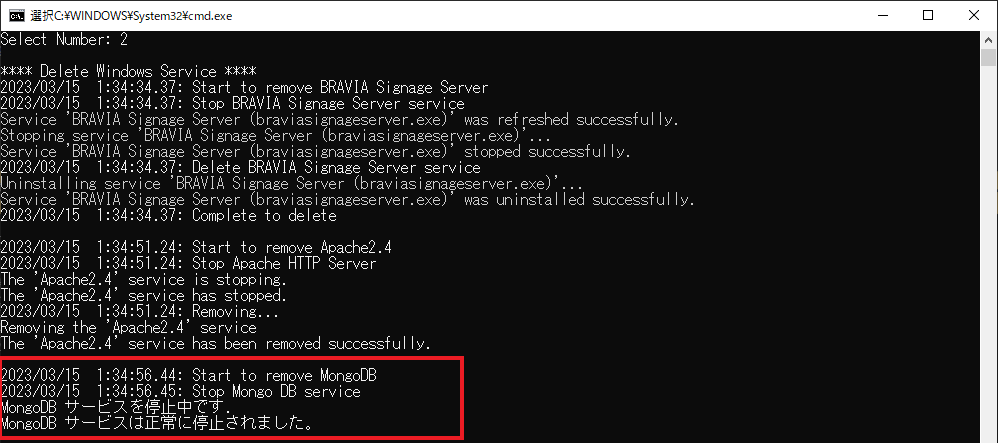
( For update to BRAVIA Signage Server 2.0.0 or later )

[5] (Only when updating from BRAVIA Signage Server 1.8.4 or earlier to version 2.0.0 or later) The data migration from MongoDB to PostgreSQL is performed automatically as shown below.

MongoDB will be uninstalled. If multiple versions of MongoDB are installed, select the one that was used with the previous version of BRAVIA Signage Server.

[6] Next, update BRAVIA Signage Server. If you have not set up authentication for BRAVIA Signage Server, set up authentication first. The authentication is enabled by default. However, you may select to disable the authentication. In this case, be aware of the risks before making the selection. (Use a password of 8 or more characters that includes both alphabets and numbers.)
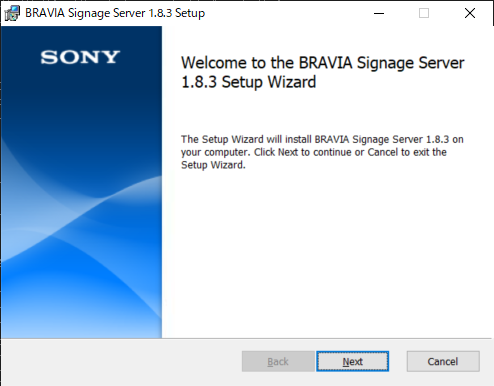
[7] The installation screen is displayed when the authentication settings are complete. Follow the instructions on the screen and perform the BRAVIA Signage Server update.
[8] After the update of BRAVIA Signage Server, the configurations are automatically executed.
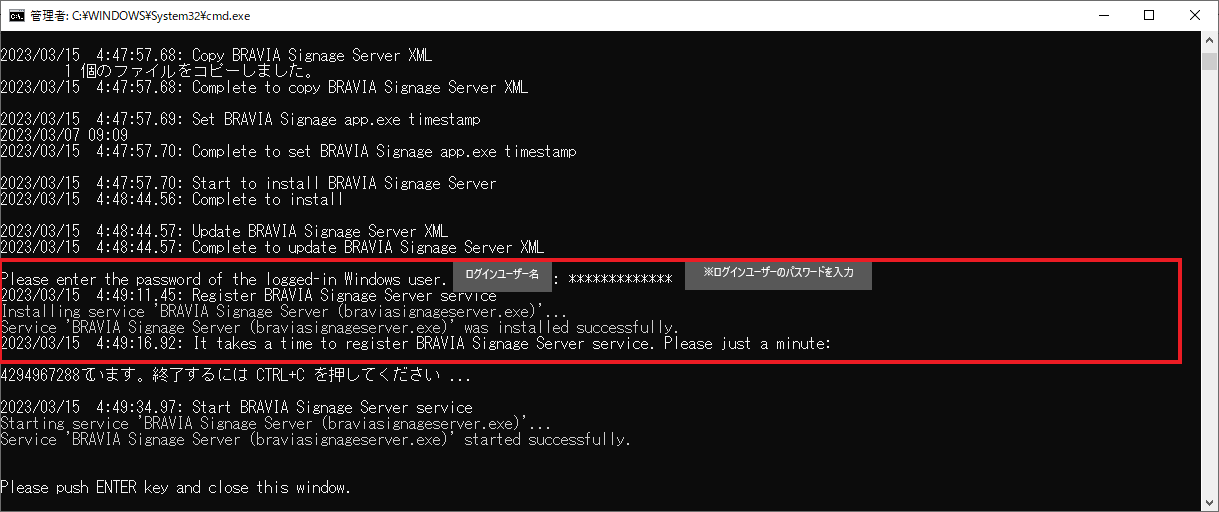
[9] Push the “ENTER” key to close the window.
[10] Double-click the following shortcut icon created on the desktop.
![]()
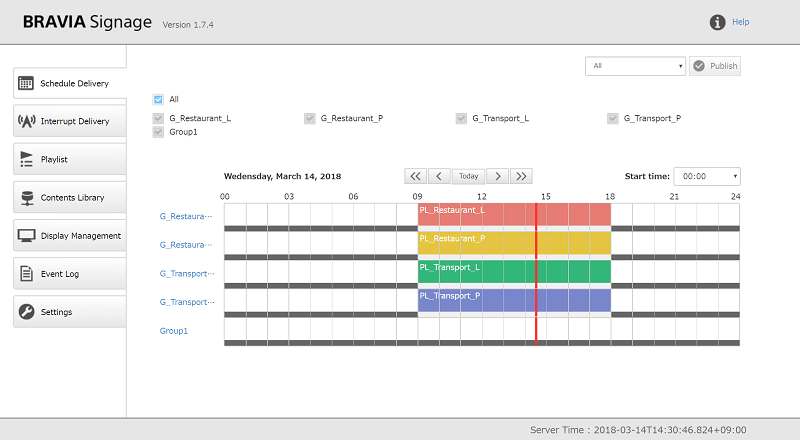
When double-clicked, Operation Web Application opens with your browser on your server.
Synology NAS
Search for BRAVIA Signage from the Package Center and update. Follow the instructions in the wizard to update the software.
Responding to data migration failure
If the data migration in [5] fails and the update cannot be completed, you can restore the environment of the previous version by following the procedure below.
Windows
[If the failure occurs when updating from version 1.8.4 to 2.0.0 or later] Uninstall using the “setup.exe” for version 2.0.0 or later, then perform a new setup using the “setup.bat” for version 1.8.4.
[If the failure occurs when updating from version 1.8.3 or earlier to 2.0.0 or later]
- Delete “C:/data/db” and “C:/data/log”, then rename “C:/data/db_bk{timestamp}” to “C:/data/db”, and rename “C:/data/log_bk{timestamp}” to “C:/data/log”.
- After uninstalling using the “setup.exe” for version 2.0.0 or later, perform a new setup using the “setup.bat” for the previous version.
Synology NAS
Start the stopped BRAVIA Signage Server.
2.2. Update BRAVIA Signage Player
This section describes how to update BRAVIA Signage Player in display.
[1] Enable the installation from a USB flash memory if you use Android 10.0 or later model and you disabled it during operation. Refer to chapter 4 in “BRAVIA Signage Startup Guide”.
[2] Copy “extapp_installer.pkg” in the package on the root directory in the USB flash memory.
[3] Turn on display and insert the USB flash memory to a USB port on the display.
[4] As the installer starts, update this application following the installer’s instructions.
[5] At next, copy “extapp_installer.pkg” under BRAVIASignageLauncher folder to the root folder in the USB flash memory.
[6] Execute same procedures as above [3] and [4].
[7] After update, configure BRAVIA Signage Player with config.txt. Refer to 1.5. Configure BRAVIA Signage Player for details.
NOTE) Don’t turn off or unplug display during the installation. It may cause display to breakdown.
2.3. Uninstall BRAVIA Signage Server
In this section, the uninstallation procedure to remove installations and configurations on the server is uninstalling. The information registered to BRAVIA Signage Server is not removed by uninstalling.
[1] Copy the “windows” folder in the package with the same version as the installed version on any directory in you Server.
[2] Right-click setup file(*1) in this “windows” folder and select “Run as administrator”. The following window is displayed:
(*1) To uninstall BRAVIA Signage Server version 1.8.4 or earlier, run “setup.bat”. To uninstall BRAVIA Signage Server version 2.0.0 or later, run “setup.exe”.
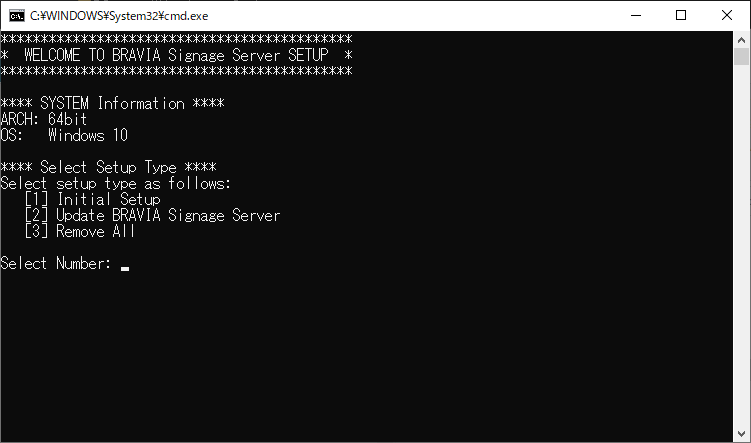
If the directory path name includes half width letters such as ‘@#$%^&()_+~-=`{}[]’, the above screen cannot be displayed depending on the combination of these letters. If the screen does not display, please confirm the directory path name.
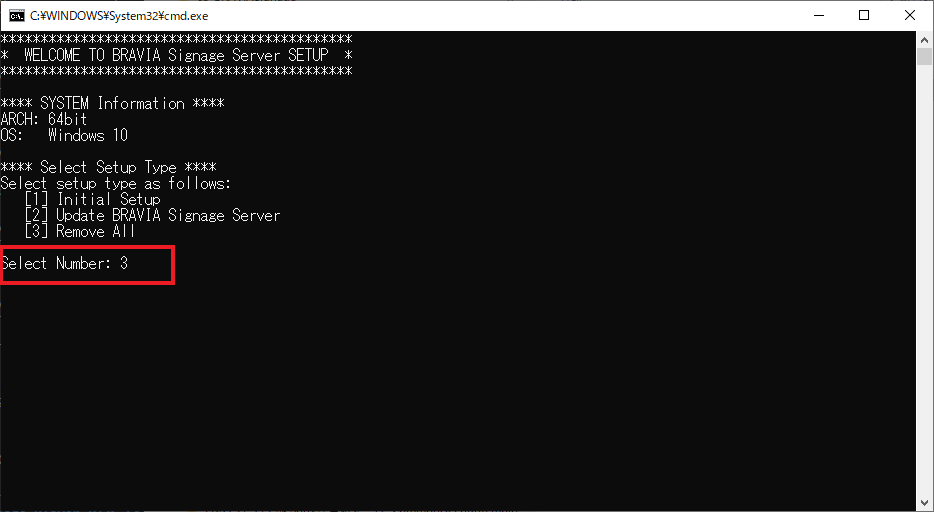
[3] Input “3” and push the “ENTER” key in this window as seen in the following diagram and the installed and configured content are automatically removed.
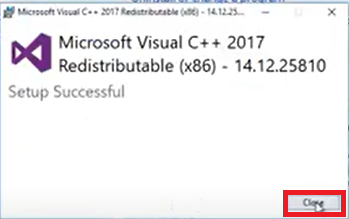
[4] If the window of “Microsoft Visual C++ 2015 Redistributable(x64)” is displayed during the uninstallation, push the [uninstall] button to uninstall.
[5] After the uninstallation of “Microsoft Visual C++ 2015 Redistributable(x64)”, push the [close] button.
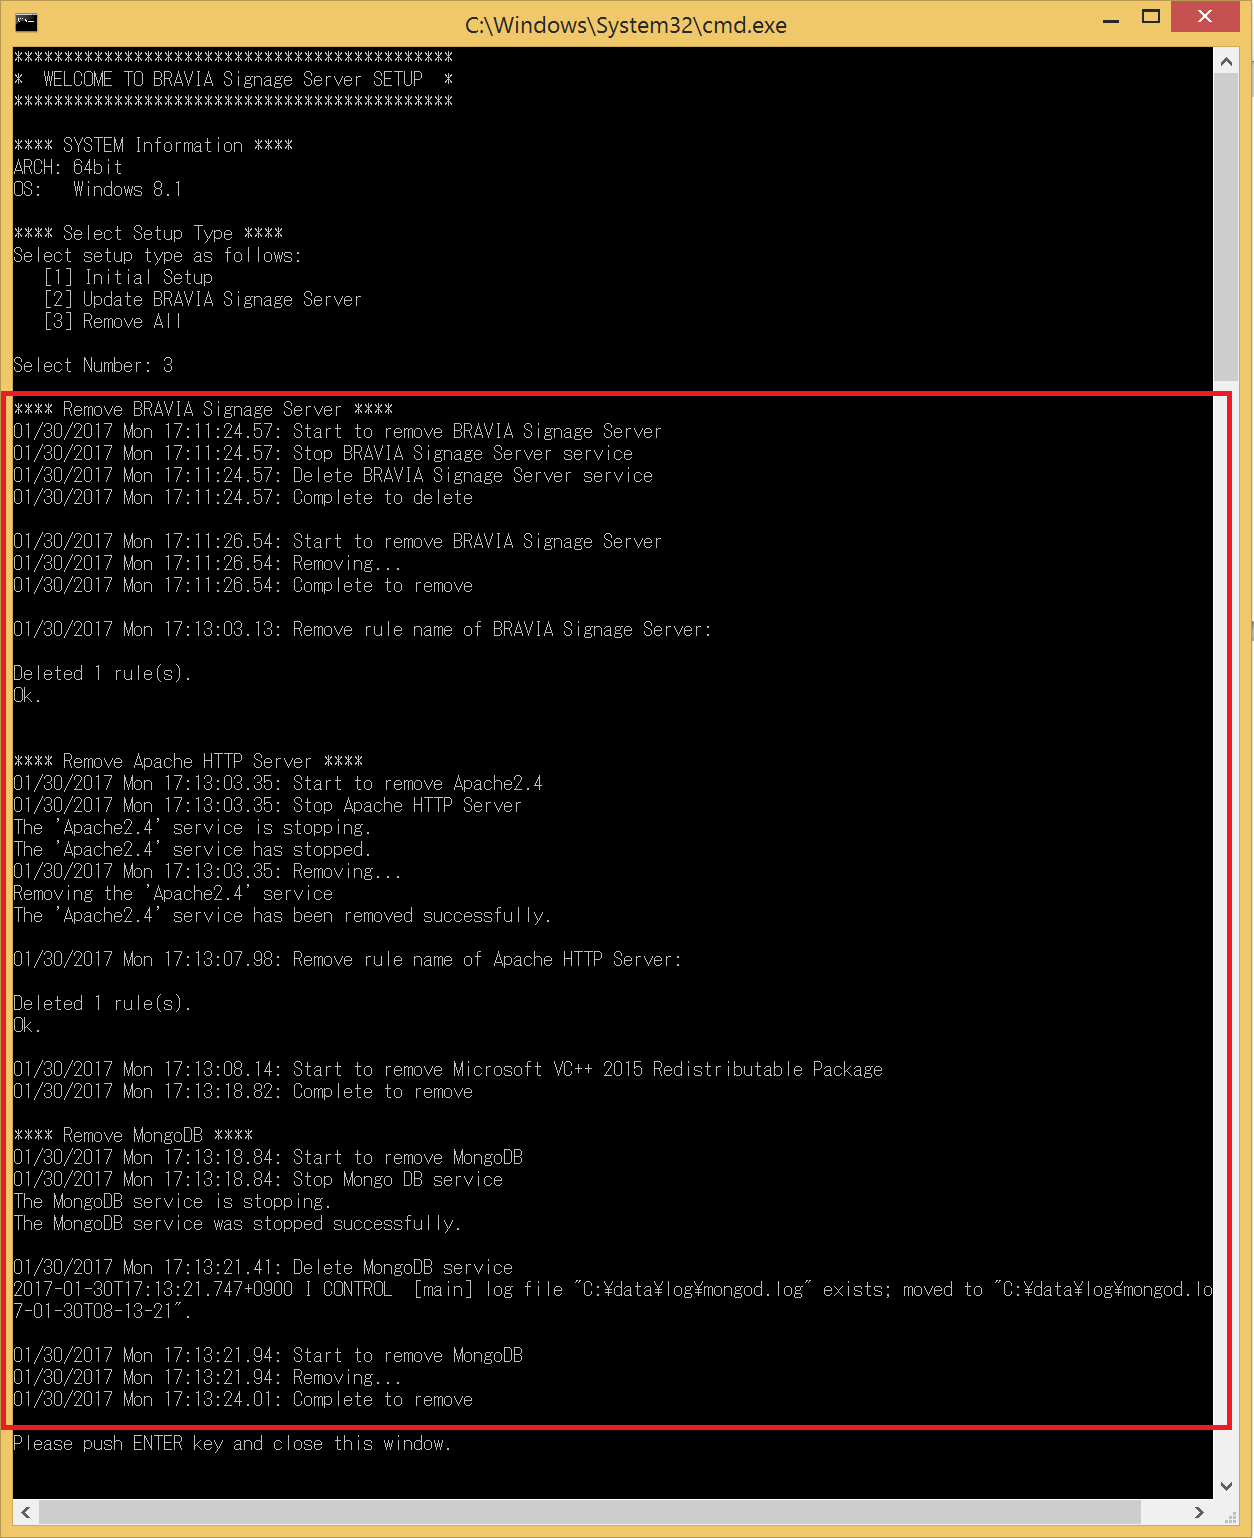
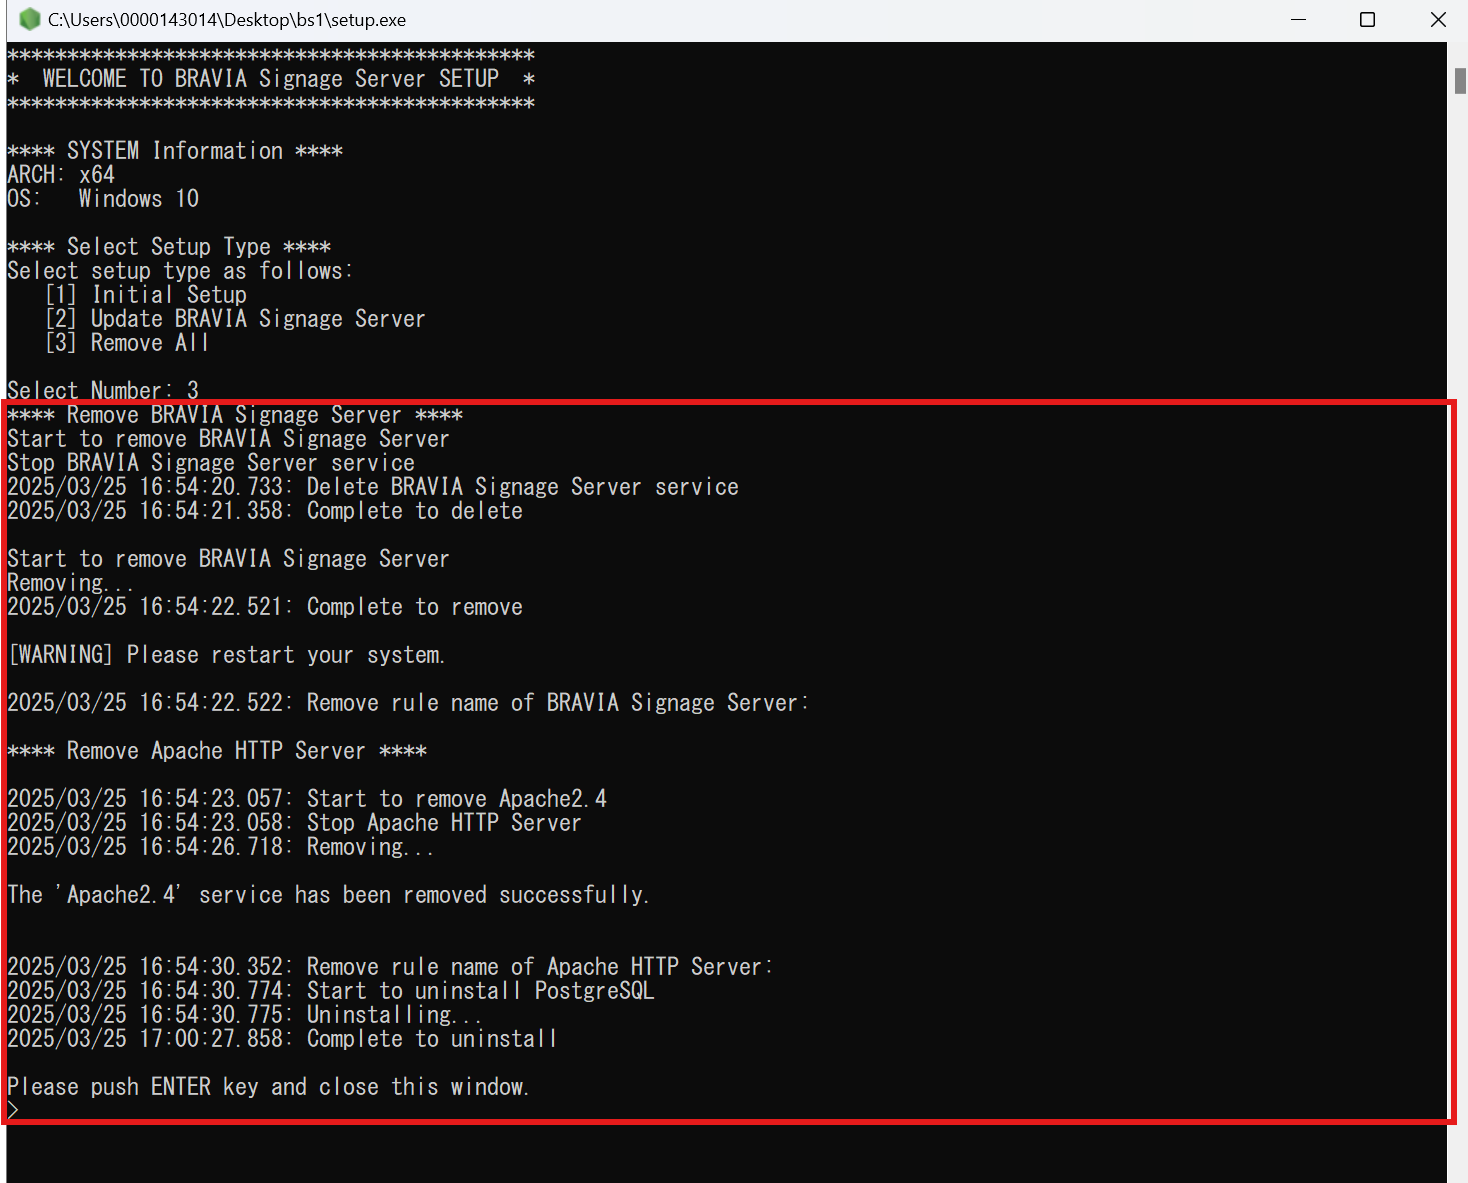
[6] The uninstallation messages for BRAVIA Signage Server, Apache, and Database software are displayed as seen below:
( For BRAVIA Signage Server version 1.8.4 or earlier )

( For BRAVIA Signage Server 2.0.0 or later )
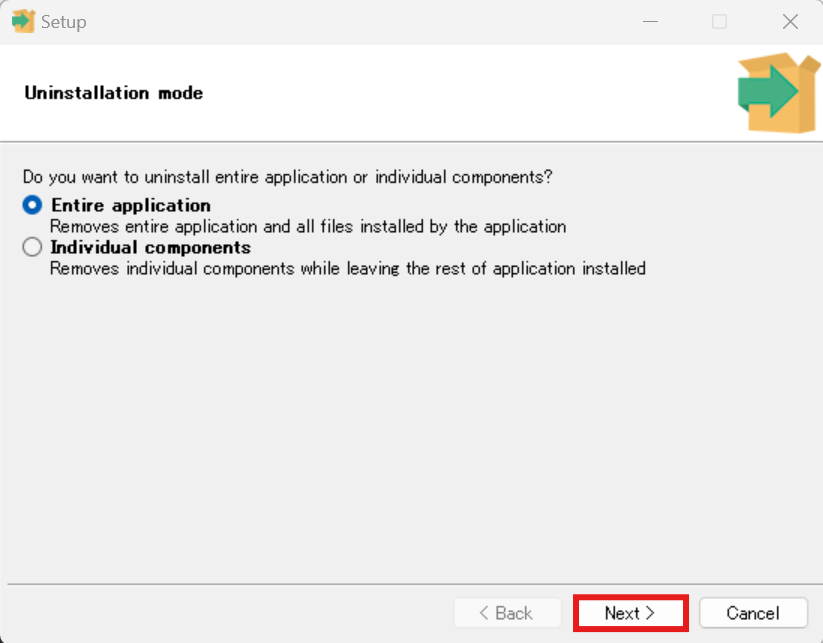
The PostgreSQL uninstallation screen is displayed. Follow the instructions on the screen to perform the uninstallation.
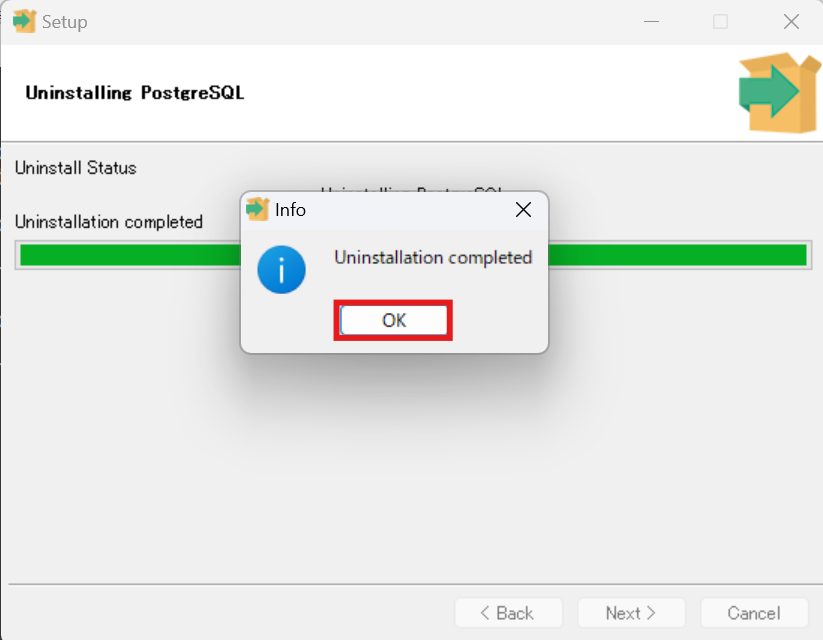
[7] Push the “ENTER” key to close the window.
[8] As in the previous descriptions, the information registered to BRAVIA Signage Server is not removed by uninstalling. If the information is unnecessary, manually remove the data as seen below:
- the information saved in MongoDB(For BRAVIA Signage Server version 1.8.4 or earlier): “C:\data” directory
- the information saved in PostgreSQL(For BRAVIA Signage Server 2.0.0 or later): “C:\data\postgresql” directory
- the log and contents in Apache : “C:\Apache24” directory
2.4. Uninstall BRAVIA Signage Player
This section describes how to uninstall BRAVIA Signage Player in display.
[1] Enable the installation from a USB flash memory if you use Android 10.0 or later model and you disabled it during operation. Refer to chapter 4 in “BRAVIA Signage Startup Guide”.
[2] Copy “extapp_installer.pkg” with the same version as the installed version in the package on the root directory in the USB flash memory.
[3] Turn on display and insert the USB flash memory to a USB port on the display.
[4] As the installer starts, uninstall this application following the installer’s instructions.
[5] At next, copy “extapp_installer.pkg” with the same version as the installed version in the package under BRAVIASignageLauncher folder to the root folder in the USB flash memory.
[6] Execute same procedures as above [3] and [4].
NOTE) Don’t turn off or unplug the display during the installation. It may cause the display to breakdown.
2.5. Notice and Information
This section describes the notice and information on BRAVIA Signage setup.
-
Downgrading of BRAVIA Signage
In the current and earlier versions, BRAVIA Signage does not support downgrades. If downgrades are performed using an earlier installer than your current version, information including your playlist and schedules will not be supported. -
Installation after BRAVIA Signage Player uninstallation
In 1.7.2 or later, if you want to install BRAVIA Signage Player after unintalling it, you need to configure with config.txt that “override” key is “ture”. If it is not “true”, the configuration from before uninstalling BRAVIA Sinage Player is taken over. -
About BRAVIA Signage Server management web app version 2.0.0 and later
When updating from version 1.8.4 or earlier to version 2.0.0 or later, the order of the groups, displays, content libraries, and interrupt delivery will change due to a revision in the database software. The order depends on the locale settings at the time PostgreSQL is installed. -
BRAVIA Signage Server 2.0.0 Update Notice
When updating BRAVIA Signage Server from version 1.8.4 or earlier to 2.0.0
If any of the following conditions apply, “Error: migration failed” is displayed and the update may fail. Please install BRAVIA Signage Server 2.0.0 after taking the actions described before updating. If you perform the update and encounter this phenomenon After restoring the previous version by following the procedure described in “What to Do in Case of Data Migration Failure,” retry the following the procedure.- If a decimal number is set for the content playback time of the playlist
[Action] Change the playback time to an integer. (BRAVIA Signage Server 2.0.0 does not allow decimals to be entered and it is not possible to revert to decimals.) - If the first letter (or the second letter if the same letter is used) of the name in “Display Name”, “Interrupt Delivery Name”, or “Display Group Name” is set as follows
- Different character types (symbols, numbers, upper-case alphabets, lower-case alphabets, hiragana, katakana, Kanji) are used in a mixed format
- Example 1:Playlist_1, playlist_2, … (mixed case alphabet)
- Example 2:Playlist_1, Playlist_#2, … (mixed numbers and symbols)
- Example 3:Playlist1, Play_list2, … (mixed alphabet and symbols)
[Action] Add a sequential number at the beginning of each name. (You can change the name back to the original name after the update)
- Example:001_Playlist_1, 002_playlist_2, …
- Different character types (symbols, numbers, upper-case alphabets, lower-case alphabets, hiragana, katakana, Kanji) are used in a mixed format
- If you are using “Interrupt Delivery” (see “5.3. Execute Interrupt Delivery”)
[Action] Delete all items for interrupt delivery and re-register using the same content.
- If a decimal number is set for the content playback time of the playlist


