REST API Configuration and Usage
Preparation
Display & IR Controller

Prepare your purchased display and remote controller.
Web browser
(e.g. Google Chrome)

Use a web browser on your computer to open the dedicated tool display_control.html or Chrome DevTools.
Local network environment

Connect to the same network. Both wired and wireless LANs are supported.
It is helpful to record the display’s IP address in advance.
Procedure: [Settings]→[Network &Internet]→[Local network setup]
How to Use
Getting Started
1.How to try using display_control.html
How to Try Using display_control.html
This section explains how to use display_control.html to send IP control commands in a computer web browser, with an example to illustrate the process.
1.Required Display Settings for Trial
Check and record the display’s IP address.
Procedure: [Settings] → [Network & Internet] → [Local network setup]
Enable [Pre-Shared Key] in [Authentication] and set the Pre-Shared Key to “1234”
Procedure: [Settings] → [Network & Internet] → [Local network setup] → [IP control] → [Authentication]
See details
Switch to HDMI 1 input
Select [HDMI 1] using the remote controller’s [Input].
The following explanation assumes [HDMI 1] for smooth trial operation.
2.Control Execution
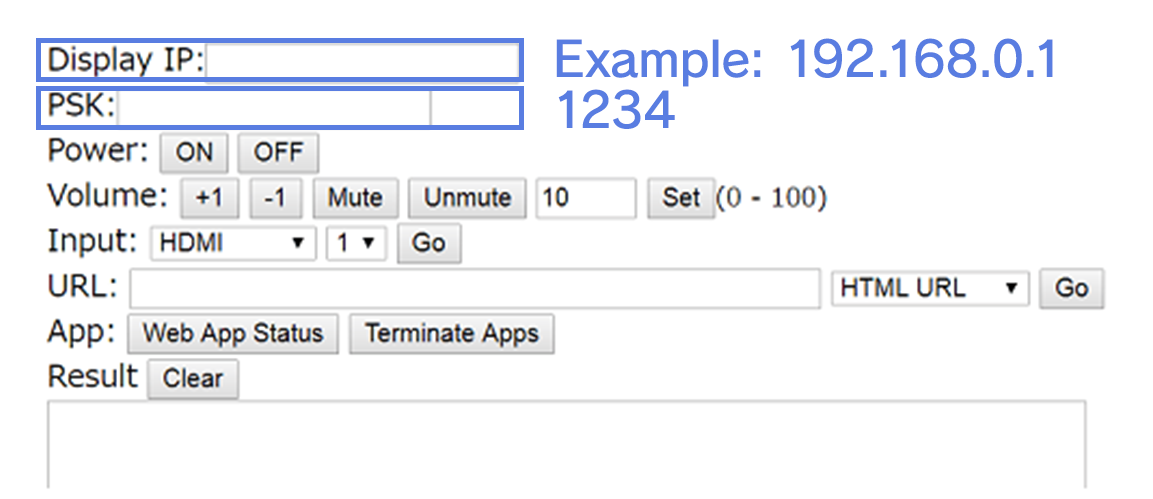
Open display_control.html in your computer browser and enter the following:
Display IP: The display’s IP address you recorded.
PSK: Pre-Shared Key (the “1234” you temporarily set on the display)

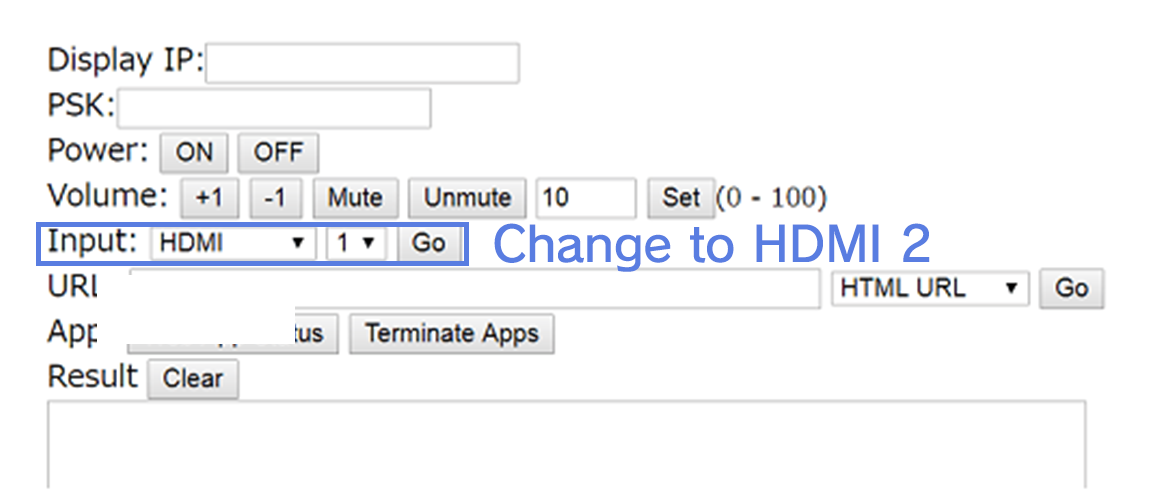
Select [HDMI 2] in the [Input] field and click [Go]. The display input switches from HDMI 1 to HDMI 2.
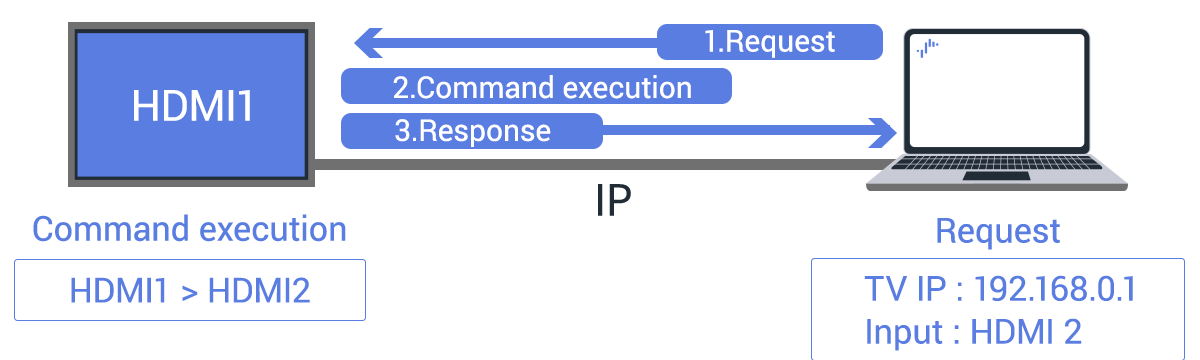
JSON-RPC Communication Example for Trial
The following JSON-RPC formatted request and response are exchanged between the display and the computer.
Example for Request (Computer → Display)
POST /sony/avContent HTTP/1.1
HOST: 192.168.0.1
 X-Auth-PSK: 1234
Content-Type: application/json; charset=UTF-8
{ method: "setPlayContent",
version: "1.0", id: 1,
params: [{uri: "extInput:hdmi?port=2"}]
}Example for Response (Display → Computer)
// HTTP 200
OK { "result":[],
 "id": 1
}2.How to check communication using Chrome DevTools
How to Run a Trial Using Chrome DevTools
As an alternative to display_control.html, you can also use Google Chrome DevTools. Send REST API commands using the following JavaScript sample.
var xhr = new XMLHttpRequest();
 xhr.open('POST', 'http://192.168.0.1/sony/avContent');
 xhr.setRequestHeader('X-Auth-PSK', '1234');
xhr.send(JSON.stringify(
{method: "setPlayContent",
version: "1.0",
id: 1,
params: [{uri: "extInput:hdmi?port=2"}]}
));Display Settings Required for Full REST API Use
1.Required display settings for REST API execution
Set the Authentication Method (Pre-Shared Key) and Level
To configure display authentication based on client authentication level, use [IP Control Authentication] in the Monitor settings. Enabling [Pre-Shared Key] allows access to private and generic level APIs.
Procedure: [Settings] → [Network & Internet] → [Local network setup] → [IP control]
The key can be set under [Pre-Shared Key]. Any character string can be used as the Pre-Shared Key.
See details
Enable Remote Device Control
Procedure: [Settings] → [Network & Internet] → [Remote device settings]→[Control remotely]
Disable Suspend
You can also address suspend state limitations by using the REST API.
See details
Recovery from Suspend State
If the display enters Suspend state unintentionally, the HTTP server stops, making REST API communication unavailable. In this case, enable the Wake-on-LAN (WoL: remote startup via network) feature to restore power to the display.
Required Display settings
Enable Wake-on-LAN
Procedure: [Settings]→[Network & Internet]→[Remote device settings]→[Control remotely]
Recovery from Suspend State via Wake-on-LAN
- Obtain MAC Address
WoL magic packets must be sent to the MAC address of the target device. Call “getSystemInformation” to retrieve the display’s MAC address. - Create WoL Magic Packet
A WoL magic packet is a UDP packet consisting of “FF FF FF FF FF FF” + the MAC address repeated 16 times. Generate based on the display’s MAC address. - Send Magic Packet
Send multiple magic packets over UDP port 9 or 7 to the broadcast address of the target display on the network. Send multiple times to ensure reliable activation of the display. - Wait for Power ON State
After sending the magic packet, wait until REST API communication becomes available. - Turn On the Display Screen
“Normal Mode” Environment: After power ON, you must additionally usesetPowerStatusto switch to the screen display state.
“Pro Mode” Environment: The screen automatically turns ON. - Execute REST API Control
Once communication is available, use REST API to control power, input, and other functions.
2.Client settings (REST API authentication and communication parameter transmission)
Pre-Shared Key
The Pre-Shared Key must be included to the HTTP request to the REST API as a custom header named “X-Auth-PSK.”
Example for X-Auth-PSK Header (Pre-Shared Key: 1234)
httpPOST /sony/system HTTP/1.1
Host: 192.168.1.100:80
Content-Type: application/json
X-Auth-PSK: 1234
Content-Length: 65