Monitor Settings (BZ40P / BZ35P / BZ30P)
In “Monitor Settings,” you can configure basic monitor operation settings.
This covers picture quality, video/audio input and output, network connection, and privacy management.
All settings can be easily accessed with the remote control.
Settings can be copied
You can use a USB drive to export and import “Monitor settings” and “Pro settings.” This allows you to apply the same settings to multiple monitors.
Monitor Settings List
Select the icon in the top right of the Normal mode Home screen to view the “Settings” list.
*The GUI is subject to change without prior notice.
* Setting items and procedures may vary depending on the Android TV OS version and firmware version.
HDMI inputs
[inputs]→[External inputs]
HDMI input information settings
Procedure: [Settings]→[inputs]→[External inputs]menu
You can specify the HDMI input name and display/hide settings for the information displayed on the display when you operate [Input select] with the remote control. If you select disable when a specific device is always connected, the user will not be able to switch.
[Manage inputs]
You can customize the HDMI input names displayed on the monitor when using [Input switching] on the remote control.

[BRAVIA Sync settings] *Compatible with Sony devices only
When you turn the monitor on or off with the remote control, BRAVIA Sync devices connected via HDMI will automatically turn on or off as well.
What is BRAVIA Sync
BRAVIA Sync is Sony’s interlinking feature that allows you to control compatible devices connected via HDMI cable using the monitor’s remote control. Supported devices include Blu-ray recorders and audio systems bearing the BRAVIA Sync logo.
Tips
To sync the monitor power with STB, connect via HDMI and use CEC commands.
For supported CEC commands, please refer to the HDMI Input Specs of each model.
[HDMI signal format]
You can specify the video signal format. There are two choices. [Standard format] prioritises compatibility with the connected device, and [Enhanced format] prioritises video quality on 4K devices.
Note:
- Support for the display of 4K 100/120 Hz picture depends on your model/region/country.
- When using Enhanced format, picture and sound may not be output correctly. In this case, connect the device to an HDMI that is in [Standard format], or change the HDMI signal format of HDMI to [Standard format].
- Only set to Enhanced format when using compatible devices.
- When using 4K picture with High-Quality, use a Premium High Speed HDMI™ Cable(s) that supports speeds of 18 Gbps. For details on a Premium High Speed HDMI™ Cable(s) that supports 18 Gbps, refer to the cable specifications.
- To display 4K 100/120 Hz picture, an Ultra High Speed HDMI™ Cable that supports 48 Gbps is required. Refer to the cable specifications to find out whether a cable supports 48 Gbps.
Picture
[Picture & Sound]→[Picture]
Picture settings
Procedure: [Settings]→[Display & Sound]→[Picture]menu
You can set the image quality according to your application.
Set [Content type] to [Video/Images], [Game], or [PC], then adjust the image quality settings below.
[Picture mode]
You can select one of the following image quality modes. This setting is available only when [Video/Images] is selected for [Content type].
Options
- Standard The image quality is suitable for everyday use.
- Professional Emphasises true reproduction of the original signal.
- Photo Image quality suitable for photo viewing.
Note
Using [Picture mode] may increase power consumption.
[Brightness]
You can adjust brightness, contrast, gamma correction (tone correction), advanced black level, black enhancement (auto dark area correction), and the intensity of auto contrast correction.
[Colour]
Adjust the colour saturation level and Hue.
[Advanced colour adjustment]
- [Adv. colour temperature: Basic]
Finely adjust the colour temperature for each colour. - [Adv. colour temperature: Multi point (10p)]
Professional calibration settings. When adjusting, we recommend using a colour analyser.
[Clarity]
Adjust the picture clarity and reduce roughness.
[Motion]
You can set the following.
- [Motionflow]
Refines moving images. Increases the number of image frames to display videos smoothly. If you select [Custom], you can adjust [Smoothness (Camera)], [Smoothness (Film)] and [Clearness]. - [Film mode]
Optimises picture quality based on video content, such as movies and CG. Smoothly reproduces the motion of filmed images (images recorded at 24 frames per second) such as movies.
Note:
When [Content type] is set to [Game], [Motion blur reduction] is enabled, and [Motionflow] and [Film mode] are disabled.
[Video signal]
You can configure the following colour and HDR settings.
- [Color space]
Change the colour reproduction range. - [HDR mode]
You can set the HDR mode (High Dynamic Range, a technology that enhances the contrast of images) to suit the environment. Normally, we recommend leaving this setting as [Auto].
Sound (Built-in speakers)
[Picture & Sound]→[Sound (Built-in speakers)]
Built-in speaker audio and output level settings
Procedure: [Settings]→[Display & Sound]→[Picture & Sound]→[ Sound (Built-in speakers) ]menu
You can configure the monitor’s built-in speaker output and audio quality. There are two types of settings: settings for each audio output and overall speaker balance adjustment.
Sound settings
- [Surround]
Virtually reproduce realistic surround sound.
– [Auto] automatically turns on/off surround sound processing according to the content.
– [On] surround sound processing is always on regardless of the content.
– [Off] surround sound processing is turned off. - [Surround effect]
Adjust the surround sound effect. Available when [Post-processing]is set to [Standard] or [Dolby Audio processing]. - [Dialogue enhancer]
Enhances voices often drowned out by background music and sound effects, making dialogue easier to hear. Displayed when [Post-processing] is set to [Standard]. - [Equaliser]
Adjust sound based on different frequencies.
Volume settings
- [Balance] Adjust the left/right speaker balance.
- [Advanced auto volume] Keeps the volume level consistent for all contents and inputs.
- [Dolby AC-4 Dialogue level] Adjusts dynamic range of Dolby AC 4 signal.
Dynamic range settings
- [Dynamic range]
Compensates for audio level difference between input sources (for Dolby Digital audio and HE AAC audio).
Available when connected via HDMI or during Media Player playback. - [DTS Dynamic range]
Adjusts dynamic range of Dolby AC 4 signal.
General
{Post-processing]
Select the audio processing type.
Option
- [Standard] Processes the sound with Sony acoustic technology.
- [Dolby Audio Processing] Processes the sound with Dolby acoustic technology.
- [DTS Virtual:X] Processes the sound with DTS acoustic technology.
Adjust HDMI signal format
Bottom of [Picture & Sound]
Procedure: [Settings]→[Display & Sound]→bottom of [Picture & Sound]
[Adjust only for HDMI 1]
Enable this setting to set the HDMI 1 quality and sound quality. When [On], the picture and sound quality is adjusted for the currently selected video input or app. When [Off], the picture and sound quality is adjusted for all inputs and apps. Before adjusting, choose whether to restore the previously used settings or overwrite them with the current settings.
[Prioritise HDMI signal format]
Automatically sets the content type based on the Content Type information in the HDMI signal. If it does not set automatically, set this to [Off].
Audio output
[Audio output]
Audio system integration and audio output settings
Procedure: [Settings]→[Display & Sound]→[Audio output]menu
You can configure the audio output destination and adjust settings for integration with connected audio systems, including Bluetooth devices and optical digital audio output.
[Speakers]
Select the audio output destination. When connecting an audio system, use this setting to switch the output destination to the audio system.
[Audio system settings]
Configure various sync settings with a Sony audio system connected via HDMI.
- [Audio system prioritization]
When enabled, this automatically switches the audio output to a BRAVIA Sync-compatible audio system when the monitor is turned on. - [A/V sync]
Adjusts the output timing to reduce the delay between video and audio when using a Sony audio system connected via HDMI.
Auto: adjusts audio and video timing according to the audio output device to reduce audio delay.
On: provides a fixed amount of adjustment for audio delay caused by audio output devices.
Off: adjustment of audio delay is turned off. - [Digital audio output]
Auto: output compressed audio.
Prioritize pass through: pass through the intended audio signals automatically to output high-quality audio.
PCM: always outputs PCM. - [eARC setting]
When an eARC supported device is connected to HDMI 3 (eARC/ARC), the status of the audio device is automatically determined and high-quality audio is output. When connecting the monitor and an eARC supported device, use of an authorised Premium High Speed HDMI™ Cable(s) is recommended.
[Bluetooth device settings]
Configure settings for Bluetooth audio devices (A2DP compatible).
- [A/V sync]
Auto: adjusts audio and video timing according to the audio output device to reduce audio delay.
On: provides a fixed amount of adjustment for audio delay caused by audio output devices.
Off: adjustment of audio delay caused by audio output devices is turned off. - [Bluetooth settings]
Enables or disables the Bluetooth audio device connection.
[Optical digital audio output settings]
You can adjust the output settings and output levels for the optical digital audio output, as well as digital audio formats such as PCM and pass-through.
This setting is available only when connected.
- [Optical digital audio output]
Enables or disables the optical digital audio output. - [Digital audio output]
Configure the output method when outputting digital audio.
Auto: outputs compressed.
Prioritise pass through: performs pass-through output.
PCM: select if the audio system does not support Dolby Digital or DTS. - [Optical digital audio output volume]
Adjusts the digital audio output level. Only valid for the PCM sound source.
The volume levels between the PCM sound source and the compressed sound source will differ.
Note:
- When connecting via eARC to HDMI 3, audio signals are passed through, so the [Digital audio output] is disabled.
- The system sound and voice response sound are not output during pass-through audio output.
- Select PCM if your audio system does not support Dolby Digital or DTS.
Ambient picture optimization
[Ambient optimization]
Procedure: [Settings]→[Display & Sound]→[Ambient Optimization]menu
[Auto adjust according to ambient light]
Optimises picture brightness or colour automatically by sensing the luminance of ambient light.
The colour adjustment is only available for compatible models.
[Advanced settings]
You can configure advanced settings.
- [Auto luminance level]
Enables automatic adjustment of the display according to ambient light. - [Auto tone curve]
Automatically adjusts the balance of light and dark to make it easier to see the image in the dark even in a well-lit room.
Network & Internet
[Network & Internet] For Developer
Network & internet connection settings
Procedure: [Settings]→[Network & Internet]menu
You can configure internet connection, network settings (wired/wireless LAN), and IP address assignment (manual/automatic).
[Wi-Fi]
You can turn the built-in Wi-Fi on or off and select a Wi-Fi network to connect to. You can also add and connect to private Wi-Fi networks.
[Scanning always available]
Set this to allow apps and other services to scan Wi-Fi networks even when Wi-Fi is off.
[Wired LAN]
When the connection is successful, “Connected” and the MAC address are displayed.
[Proxy settings]
Specify the server name and port number manually when using a proxy server.
Note:
HTTP proxy applies only to the web browser and does not apply to other apps.
[IP settings]
You can select how the IP address is obtained. For manual settings, select [Static] and enter a valid IP address. For automatic settings, select [DHCP].
[Network status]
Displays the current network status. You can perform connection diagnosis by pressing [Enter] button on the remote control.
[Remote device settings]
Enables remote control of the display from apps on mobile devices. Register and enable the devices you want to use for remote control.
Local network, IP control settings
[Network & Internet]→[Local network]
Settings for access authentication and API usage
Procedure: [Settings]→[Network & Internet]→[Local network]menu
To control the monitor from an external device on the local network, make the following settings.
[Server diagnostics]
Diagnoses whether the device can connect to a server on the local network.
[DLNA player]
If this is enabled, you can play back recorded data or music data saved on other devices in the local network.
[IP control] For Developer
Procedure: [Settings]→[Network & Internet]→[Local network]→[IP control]menu
These settings are required when connecting the monitor and HTML5 apps or external systems to the same network and controlling them using APIs and protocols provided by BRAVIA Professional Displays.
*EU models have different specifications.
Settings Items in [IP control]
[Authentication]
You can select an authentication method to allow access only from specified devices and prevent unauthorized access for enhanced security. Four methods are available. Typically, use [Pre-Shared Key] for commercial displays and [None] for managed networks.
Options
- [None]
Available in Normal mode only. No authentication is required to access the monitor. - [Normal]
A PIN code is required to access the monitor. The PIN code is configured in [Pro mode lock]. - [Pre-Shared Key]
Available in Normal mode only. It is a user-defined secret key that allows authentication using a fixed string. When enabled, Pre-Shared Key private (highest authentication level) and generic (medium authentication level) become available. - [Normal and Pre-Shared Key]
Either a PIN based authentication or a fixed string authentication is required to access the monitor.
Tips:
When the client does not support authentication method selection, Pre-Shared Key is commonly used. In this case, configure the key from the [Pre-Shared Key] menu on the monitor.
[Pre-Shared Key]
When [Authentication] is set to either [Pre-shared key] or [Normal and Pre-shared key], you can configure the key.
[Simple IP control]
Simple IP Control is a TCP-based SSIP (BRAVIA Professional Displays proprietary protocol). Used to remotely control the monitor over the local network.
For details, here.
Tips
To use REST API or IRCC-IP and prevent the monitor from entering suspend mode, enable [Simple IP control].
- For details, see REST API suspend mode.
- For details, see IRCC-IP suspend mode.
[Control4®]
BRAVIA Professional Displays are compatible with the integrated control platform “Control4®,” enabling monitor operation from the system and integration with other smart home devices. Enable this setting when using.
Privacy, App permission
[Privacy], [App] For Developer
Procedure: [Settings]→[Privacy], [App]
Configure the security of device, account and app settings.
Settings Items in [Privacy]
- [Location]
You can configure Google Location Services settings for obtaining your current location, including Wi-Fi-based location and always-on scanning. You can also view apps that have requested location access. - [Microphone]
You can set apps to allow microphone access. - [Camera]
Allow camera access for apps. - [App permissions]
For each Android app, you can set permissions to access functions and information on the monitor. - [Special app access]
You can set the following advanced settings for the functions and information that apps can access.- [Energy optimization]
Optimise your app’s electricity usage. - [Usage access]
Allows specified apps to track other app usage, frequency, carrier, language preferences, and more. - [Notification access]
Allows specified apps to read all notification content, including personal information such as contact names and message text. Apps can also dismiss notifications or activate action buttons they contain. - [All files access]
Allows specified apps to read, modify, and delete all files in the display or in connected storage. This setting may allow files to be accessed without explicit user interaction. - [Display over other apps]
Allows other apps to overlay on top of the app you’re using. This can make other apps harder to see or can change how they look or behave. - [Media management apps]
If allowed, this app can change or delete media files created by other apps without asking for confirmation. To use this feature, you must enable [All files access]. - [Modify system settings]
Only specified apps can change the monitor system settings. For security, only apps that you explicitly approve can change settings. - [Alarms & reminders]
You can specify apps and set alarms and time-based actions. This setting allows apps to run in the background, which can increase power consumption. If you disable this permission, existing alarms and time-based events will also stop working. - [Turn screen on]
Enables specified apps, such as alarm or call apps, to turn on the screen of the monitor. The app can turn the screen on at its discretion without pressing the power button.
- [Energy optimization]
Note
[Turn screen on] When the monitor is suspended, the target app may also be stopped and the screen may not turn on.
How to disable the suspended state: See here
- [Security & Restrictions]
You can set permissions to install HTML5 applications. Enable this if you need to install BRAVIA Signage (paid version) or custom apps. However, for security reasons, we recommend disabling this setting after installation.
[Apps]
This section covers [App permissions], [Special app access], and [Security & restrictions] from this [Privacy] menu, and these settings can be configured here.
System
[System] For Developer
Basic settings of the monitor
Procedure: [Settings]→[System]menu
In addition to basic settings such as date and language, you can restart the display and configure power-saving settings. The available settings are as follows.
[Screen saver]
To prevent burn-in of the screen, you can set the screen saver image and the amount of inactivity time before starting up.
[Power and energy]
You can configure detailed power-saving settings and perform quick setup using the ECO menu. If 24/7 operation is required, some of these settings may need to be disabled.
[About]
You can check the device name, operation status, and Android TV OS information (versions, security patches, etc.) .
Also, configure notifications for software updates over the network and when new versions are released.
[Date & Time]
You can configure the time zone and date/time settings.
[Language]
You can select the display language.
[Keyboard]
You can configure settings for both the software and physical keyboards.
[Storage]
You can check the current usage of the monitor’s internal storage.
[System sounds]
You can enable or disable the operation sounds of the monitor.
[Parental controls]
You can configure usage restrictions for external inputs and apps.
[LED indicator]
You can set the indicator light (LED) that lights up when operating the display to always on or always off.
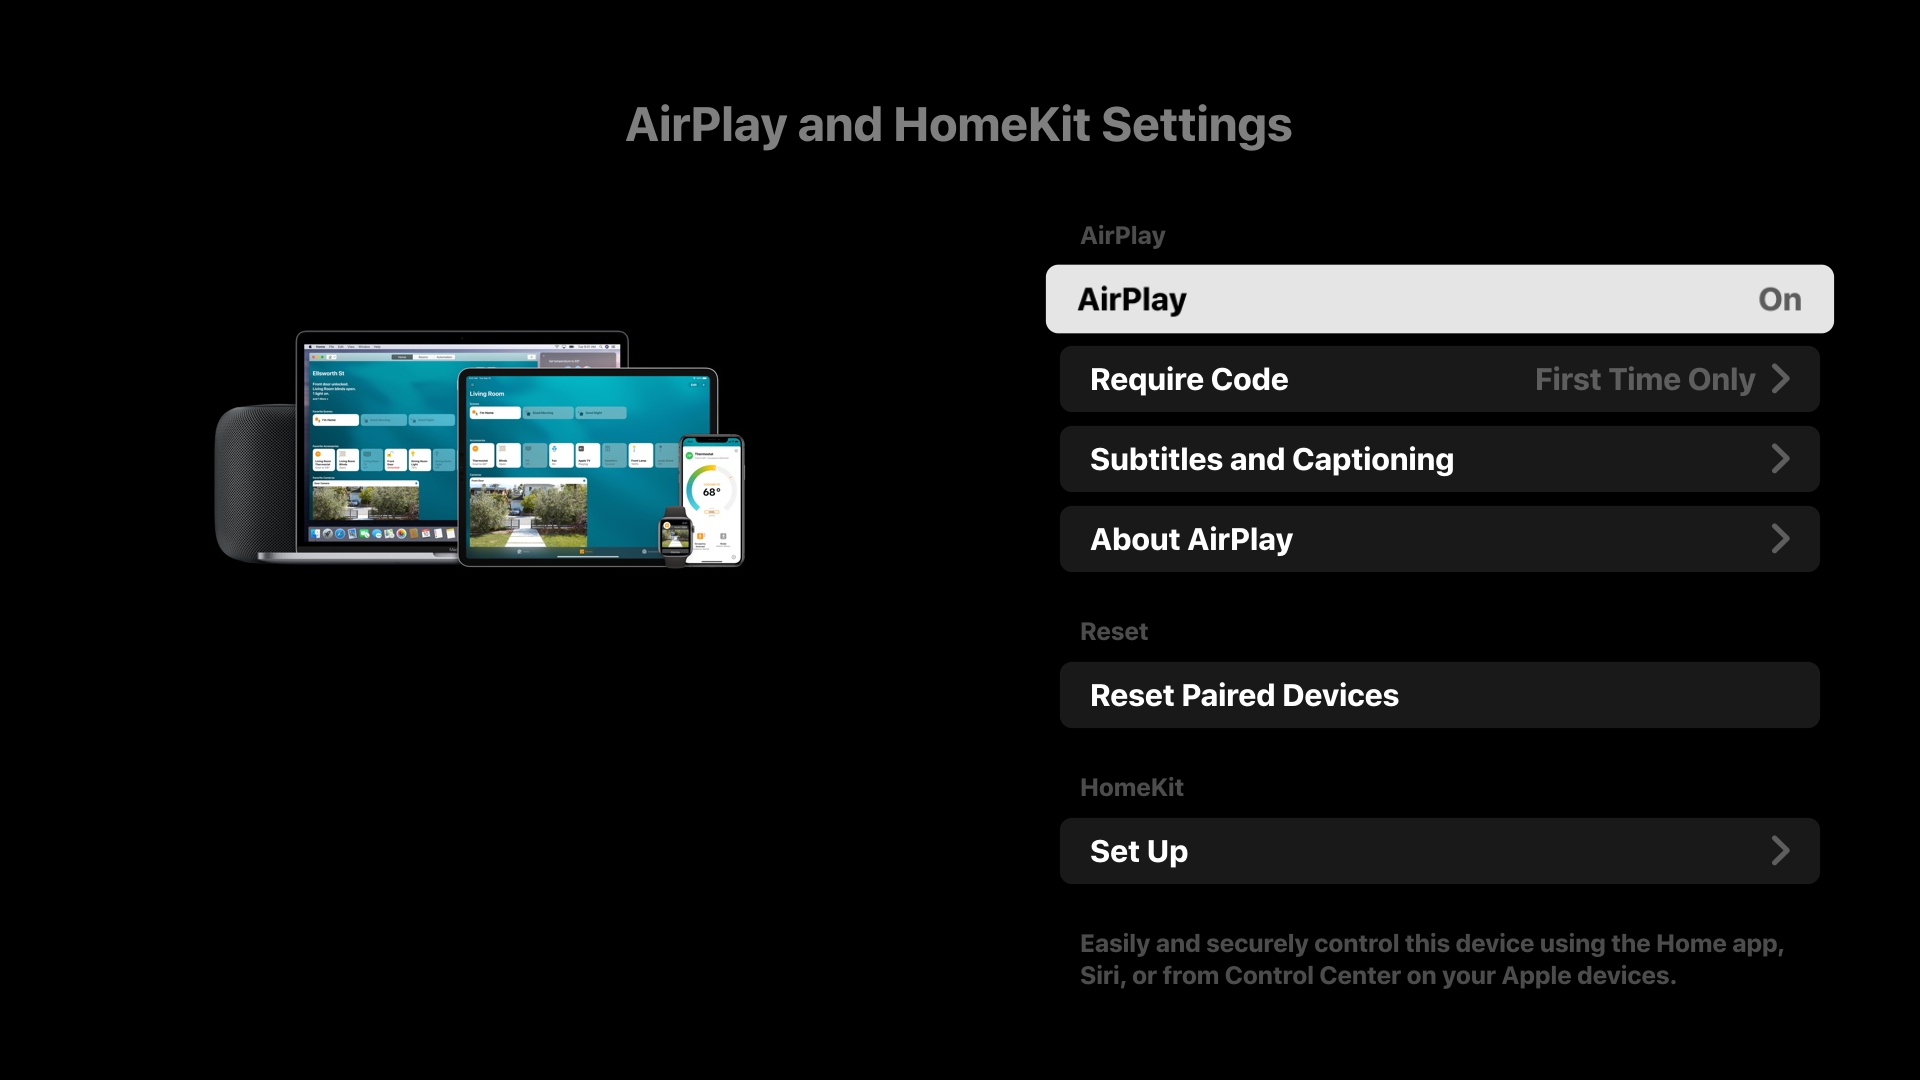
[Apple AirPlay & HomeKit] For Developer
Configures the settings for Apple AirPlay & HomeKit.
AirPlay Settings Items
- [AirPlay] [ON] (enabled) or [OFF] (disabled) connections.
- [Require Code] You can choose how often to require a passcode.
- [Subtitles and Captions] You can choose to enable or disable subtitles, and set subtitle size, colour, and more.
HomeKit Settings Items
You can set rooms, names, notifications, and more.
Tips
We recommend using Restore AirPlay Settings when using AirPlay in “Pro mode.”
Procedure: [Pro settings]→[Startup Services]→[Restore AirPlay Settings]
[Initial setup]
You can perform the initial settings following the instructions that appear when you turn on the power for the first time after purchase.
[Restart]
Restart the monitor.
Developer option
[System]→[Developer option] For Developer
Procedure: [Settings]→[System]→[Developer option]
Select [Developer options] and press [OPTIONS] on the remote control 10 times, and the settings screen will be displayed.
- [Stay awake]
You can disable sleep mode to prevent the screen from turning off during work. - [Bluetooth HCI snoop log]
Enables Bluetooth packet capture. After changing this setting, turn [Bluetooth] off and back on. - [Picture color mode]
When enabled, displays image colours in sRGB.
DEBUGGING
- [USB debugging]
When enabled, you can debug via USB connection between a PC and the display using development tools. - [Wireless debugging]
When enabled, you can debug over Wi-Fi. Development tools can be used wirelessly. - [Select mock location app]
You can specify a mock location app for testing purposes. Connect the app via USB, enable app installation for the specified app in [Security and restrictions] under [Apps] in the device settings, and install it. Then configure this feature. - [Enable view attribute inspection]
When enabled, developers can inspect attribute information for UI elements in apps. Used for debugging during app development. - [Wait for debugger]
When enabled, the monitor waits until a debugger is connected before starting the app. Used to debug processes after app launch. - [Select debug app]
Select the app to debug. Connect the app via USB, enable app installation for the specified app in [Security and restrictions] under [Apps] in the device settings, and install it. Then configure this feature. - [Verify apps over USB]
When enabled, apps installed via USB can be checked for malicious behaviour. - [Logger buffer sizes]
Set the size of the memory area where logs are temporarily stored.
NETWORK
- [Wireless display certification]
A confirmation will be displayed when a connection request is received. - [Enable Wi-Fi verbose logging]
Increases the Wi-Fi log level to display SSID (network name) and RSSI (received signal strength) in the Wi-Fi picker. Used to debug Wi-Fi connection issues. - [Mobile data always active]
Keeps mobile data connection active even when Wi-Fi is connected. - [Select USB configuration]
Select the operation mode when USB is connected. Choose from: [Charging], [MTP (Media Transfer Protocol)], [PTP (Picture Transfer Protocol)], [RNDIS (USB Ethernet)], or [MIDI].
INPUT
- [Show taps]
When enabled, displays a circle or dot at the tap location, making it easy to see where the screen is being touched. - [Pointer location]
When enabled, detailed touch information such as touch coordinates and touch pressure on the touchscreen* is overlaid.
* Sold separately.
DRAWING
- [Show surface updates]
Flashes the entire display area each time it is updated. This is a debugging feature for checking UI redraw frequency. - [Show layout bounds]
Visualizes layout information such as clip boundaries and margins of UI elements. - [Force RTL layout direction]
Forces the screen layout direction to RTL (right-to-left) . Used to test layouts for right-to-left languages such as Arabic and Hebrew. - [Window animation scale]
Adjusts animation speed when apps start and close. Select from 7 levels: [Animation Off] (0×) to maximum 10×. - [Transition animation scale]
Adjusts animation speed for screen transitions within apps. Select from 7 levels: [Animation Off] (0×) to maximum 10×. - [Animator duration scale]
Adjusts animation speed for fine UI elements within apps. Select from 7 levels: [Animation Off] (0×) to maximum 10×. - [Simulate secondary displays]
When enabled, a virtual external is simulated on the screen. This allows you to test multi-display environments without physically connecting an external display.
HARDWARE ACCELERATED RENDERING
- [Show view updates]
Highlights updated areas during screen rendering. - [Show hardware layers updates]
Displays UI elements using hardware layers in green when updated. - [Debug GPU overdraw]
Colour-codes areas where the same pixel is drawn multiple times. - [Debug non-rectangular clip operations]
Visualizes clipping operations in non-rectangular areas. - [Force 4× MSAA]
Forces multi-sample anti-aliasing (MSAA) to be enabled in OpenGL ES 2.0 apps. - [Disable HW overlays]
Disables hardware overlays and always uses GPU compositing. - [Simulate color space]
Simulates colour vision deficiencies to verify app appearance.
MEDIA
- [Disable USB audio routing]
Disables automatic switching to USB audio devices.
AUDIO
- [Record Audio]
Enables audio recording functionality during debugging.
MONITORING
- [Strict mode enabled ]
Warns by flashing the screen when time-consuming operations are performed on the main thread. - [Profile HWUI rendering]
Displays a drawing performance graph on the screen. - [Enable OpenGL traces]
Enables OpenGL tracing for debugging graphics performance.
APP
- [Don’t Keep Activities]
Destroys apps when moved to the background. Allows you to simulate low-memory conditions. - [Background Process Limit]
Limits the number of background processes that can run simultaneously. - [Show All ANRs]
Displays notifications when background apps become unresponsive (ANR). - [Standby Apps]
Sets apps to standby mode and restricts background activity. Select an app from the list to configure. - [Force allow apps on external]
When enabled, allows all apps to write to external storage regardless of manifest values. - [Force activities to be resizable]
When enabled, allows all activities to be resized in multi-window mode regardless of manifest values.
[Accessibility]
Procedure: [Settings]→[Accessibility]
[Accessibility] has a shortcut function so you can turn it on or off by pressing and holding the [Mute] button on the remote control for 3 seconds.
Tips:
To change the shortcut function, select [Accessibility shortcut] in [Accessibility], enable [Enable accessibility shortcut], and change the function in [Shortcut service].
This model has accessibility features as the following:
- Text magnification
- Color inversion
- Mono audio
- Text scaling
- Bold text
- Color correction
- Accessibility shortcut
- Keyboard accessibility
- Audio description
- Subtitle settings
- High contrast text
- Power-on volume
Note:
Some features do not apply depending on your model/region/country.
Bluetooth, serial communication settings
[Remotes & Accessories] For Developer
Procedure: [Settings]→[Remotes & Accessories]menu
You can set Bluetooth pairing and serial communication.
[Bluetooth]
You can pair Bluetooth devices and enable or disable Bluetooth
[RS232C control]
You can enable control via serial communication (RS-232C).