Multi Display Settings
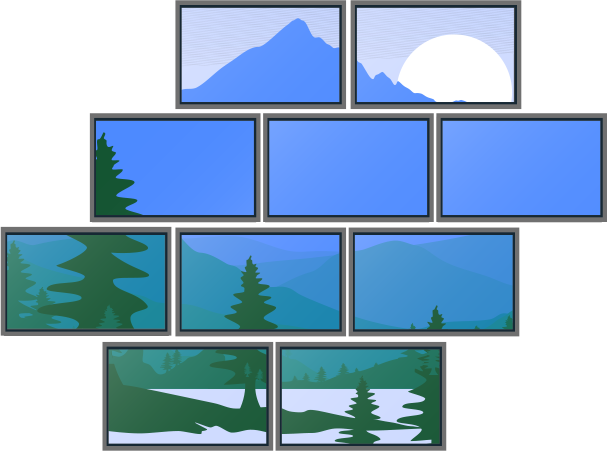
Multi Display Settings is an app that lets you combine and tile multiple monitors in landscape orientation (for multi-screen configurations). Detailed adjustments such as bezel correction and coordinate specification are also available, allowing you to create a video wall environment without the need for dedicated equipment.
Features
Tiling Up to 25 Displays
Tile up to 25 landscape displays (5×5 max) via HDMI. Freely divide and scale content into various formats including diamonds, trapezoids, and large screens. Ideal for impactful presentations and DOOH applications.
No Dedicated Controller
Easy and flexible configuration without a dedicated video wall controller. Reduce installation and setup costs and labor.
Flexible Layout Options
Since individual bezel correction is also supported, high-quality display tailored to your site environment and installation conditions are possible.
System Configuration
To use Multi Display Settings, all monitors need to be wired so that they receive the same video signal via HDMI. This requires an HDMI distributor to distribute the signal from a single input device to multiple monitors. Prepare an HDMI distributor separately and connect each monitor accordingly.

Required Monitor Settings
Setup procedures depend on the Android TV OS version of the monitor.
How to Verify the Version
Procedure: [Settings]→[System]→[About]→[Device name]
For Android TV OS 12 or later
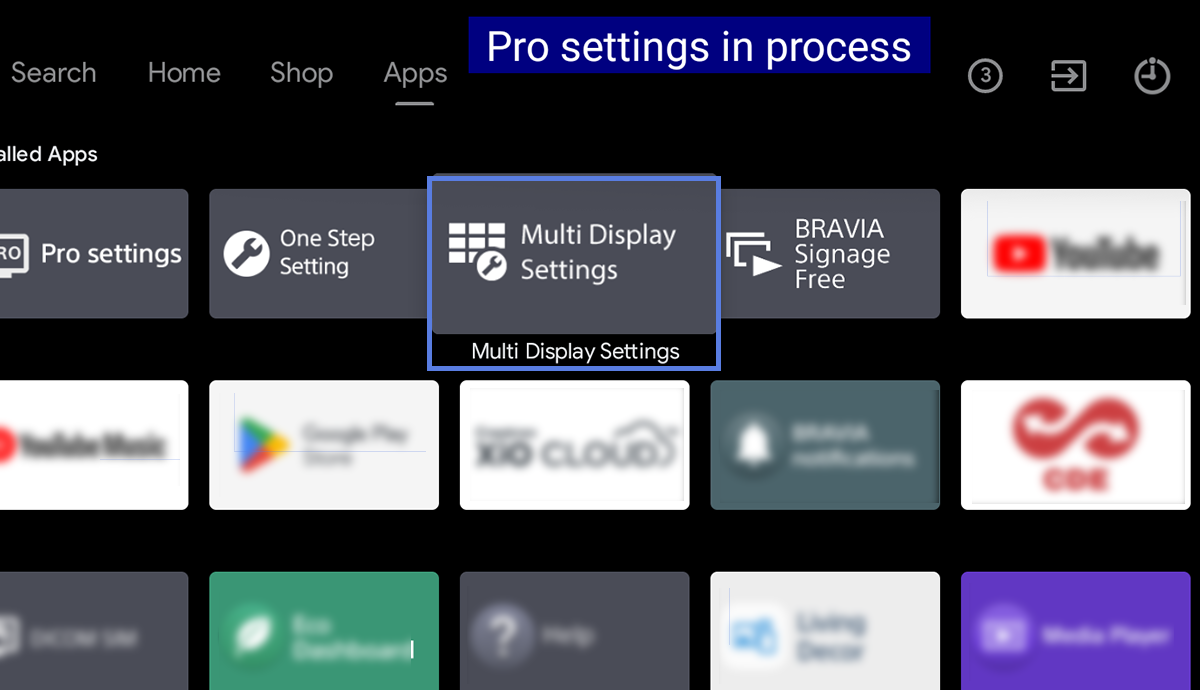
Opening the [Multi display settings] from the [Home] screen in the “Pro settings mode” environment automatically starts the initial setup. The monitors restart and become available.
For Android TV OS 10 or earlier
Select [Multi display settings] from the list of [Launch services] in the “Pro settings” menu to start the installer. Follow the on-screen instructions. The monitors will restart and become available.

How to Use
Using the Remote Control
You can configure tiling by operating the [i+] and [Red] buttons on the remote control while checking the display on the monitor.
Screen transition by remote control operation

Setting screen
This is the setting screen of the application. Here you can set tiling parameters.
External input screen
The screen that shows a preview of the specified HDMI input as it will appear during actual operation is displayed.
Information screen
Displays the input source and division number for each monitor.
How to Use the Setting Screen

①Setting Mode
Select the mode based on your tiling layout.
- Simple mode
Used for N × M rectangular screen compositions (max. 5 × 5) - Advance mode
Used for non-rectangular screen compositions (such as diamond or trapezoid shapes)
②Input
Specify the HDMI input to be displayed on the monitor for tiling.
③ Natural adjustment
Removes outer margins on multi-displays.
ON No outer margins. Image is displayed to the screen edges.

OFF Outer margins enabled. Standard display.

④Dynamic Backlight Control
Keeps the display backlight brightness constant.
⑤Tiling
This screen is used to perform tiling.
Setting Items by Mode

| Setting Item | Setting Value | Description |
|---|---|---|
| Setting Type | Simple/Advance | Switch the setting mode. |
| Auto Startup | ON/OFF | Specify whether Multi Display Settings automatically launches when the main power and power are turned on. |
| Input | HDMI 1-HDMI 4 | Specify the external input to be displayed. |
| Row(X) | 1-5 | Specify the number of rows of monitors. |
| Column(Y) | 1-5 | Specify the number of columns of monitors. |
| Position | 1-25 | Specify which divided area the monitor displays. When row/column settings change, invalid positions are reassigned to the last valid position. |
| Margin(Top,Side) | 0-50 | Specify the top, left, and right bezel margins. |
| Margin(Bottom) | 0-50 | Specify the bottom bezel margin. |
| Natural adjustment | ON/OFF | Removes outer margins on multi-displays. |
| Dynamic Backlight Control | ON/OFF | Keeps the display backlight brightness constant. |

| Setting Item | Setting Value | Description |
|---|---|---|
| Setting Type | Simple/Advance | Switch the setting mode. |
| Auto Startup | ON/OFF | Specify whether Multi Display Settings automatically launches when the main power and power are turned on. |
| Input | HDMI 1-HDMI 4 | Specify the external input to be displayed. |
| Row(X) | 0-1919 | Specify the X coordinate of the base value. |
| Column(Y) | 0-1079 | Specify the Y coordinate of the base value. |
| Width | 384-1920 | Specify the monitor’s display area. |
| Margin(Top) | 0-50 | Specify the top bezel margin. |
| Margin(Right) | 0-50 | Specify the right bezel margin. |
| Margin(Left) | 0-50 | Specify the left bezel margin. |
| Margin(Bottom) | 0-50 | Specify the bottom bezel margin. |
| Natural adjustment | ON/OFF | Removes outer margins on multi-displays. |
| Dynamic Backlight Control | ON/OFF | Keeps the display backlight brightness constant. |
Useful Tools
Recommended margin settings
Select the monitor model and size to see the recommended margin settings. For “Advance mode,” also select the monitor width.